How to Create an Email Drip Campaign That Converts in 7 Days
Most drip campaigns fail before a single email lands in an inbox. Not because the copy is bad. Not because the offer is weak. Because the underlying setup — the segmentation, the trigger logic, the send timing — is held together with duct tape and guesswork. You’ve probably felt this: you spend hours building a sequence, hit publish, and watch open rates flatline at 12%.
Here’s what most tutorials skip: a converting drip campaign is really a system, not a sequence. Get the system right and the conversions follow naturally. This guide gives you the exact, step-by-step marketing automation setup to build, test, and launch a 7-day email drip campaign that actually moves subscribers toward a decision.
What Is an Email Drip Campaign?
The word “drip” is intentional. You’re not flooding someone’s inbox — you’re delivering the right message at the right moment as their interest builds. Done well, a 7-day drip can move a cold subscriber from “who are you?” to “take my money” without a single sales call.
What separates a converting drip from a forgettable one is specificity. Generic welcome sequences convert at 0.5–1%. Behavior-triggered, segmented sequences routinely hit 3–8% conversion rates, according to data from Campaign Monitor’s 2024 Email Benchmarks report. The difference is almost entirely in the setup — which is exactly what this guide covers.
Drip Campaign vs. Broadcast Email: Key Differences
| Feature | Drip Campaign | Broadcast Email |
|---|---|---|
| Trigger | Subscriber action or lifecycle event | Manual send to a list |
| Personalization | High — based on segment, behavior, tags | Low to moderate |
| Timing | Automated, delay-based | Scheduled or immediate |
| Avg. Open Rate | 35–50% (triggered) | 20–25% (industry avg.) |
| Best Use Case | Onboarding, nurture, re-engagement | Announcements, promotions, newsletters |
Before You Build: Prerequisites and Goal Setting
Skipping this section is the single most common reason drip campaigns underperform. Before touching your automation platform, you need three things locked down.
1. A defined audience entry point. Who enters this sequence and why? A subscriber who just downloaded your pricing guide is in a completely different headspace than someone who signed up for a newsletter six months ago. The entry trigger determines everything that follows.
2. A single conversion goal. Not three goals — one. Book a demo, start a trial, purchase a product, register for a webinar. One sequence, one outcome. Sequences that try to push multiple goals at once dilute focus and confuse readers.
3. An understanding of your audience’s objections. What stops your ideal customer from converting right now? Price? Trust? Timing? Confusion about fit? Write these down. Your 7 emails will address them one by one.
Step 1: Define Your Conversion Goal
Your conversion goal is the north star for every decision in this build. Be specific to the point of discomfort.
- Choose a single, measurable action. “Increase engagement” is not a goal. “Get 50 free trial signups from this sequence within 30 days” is. Make it countable.
- Set a baseline conversion rate target. If you’ve never run a drip before, target 2–3% as a realistic starting point. If you have historical data, aim to beat your last sequence by 20%.
- Identify the conversion URL or event. Where does the conversion happen — a landing page, a checkout, a calendar booking link? You need this URL before you write a single word of email copy.
- Define what happens after conversion. Does the subscriber exit the drip automatically? Get tagged? Move to a new sequence? Plan the post-conversion logic now or you’ll have subscribers receiving sales emails after they’ve already bought.
Expected outcome of Step 1: A one-sentence goal statement that reads like this: “This 7-day sequence converts [segment name] subscribers into [specific action] by addressing [top 3 objections] and is measured by [conversion rate / total conversions].”
Step 2: Segment Your Audience for the Sequence
Sending the same 7-day sequence to your entire list is the fastest way to unsubscribes and spam complaints. Segmentation isn’t optional — it’s the mechanism that makes personalization possible at scale.
- Identify your entry trigger segment. This could be: subscribers who opted in through a specific lead magnet, contacts tagged as “trial users,” or anyone who visited your pricing page twice in 7 days. The tighter the segment, the more relevant your emails will be.
- Choose your segmentation model. For most 7-day campaigns, behavioral segmentation (what they did) outperforms demographic segmentation (who they are). Someone who clicked your pricing link is more ready to buy than someone who just opened your newsletter.
- Set exclusion rules. Exclude existing customers, people who’ve already completed the goal action, and contacts who’ve unsubscribed from similar sequences. This one step alone typically improves deliverability by 15–20%.
- Build a dynamic segment, not a static list. A dynamic segment automatically adds new contacts who meet your criteria going forward. A static list is frozen at export time and requires manual updates. Use dynamic segments for any ongoing drip campaign.
For a detailed breakdown of every segmentation model — including RFM scoring, behavioral signals, and how to set up dynamic audiences — the email marketing segmentation playbook for 2026 walks through each method with implementation steps you can follow directly.

Step 3: Map the 7-Day Email Sequence
Here’s the framework that works. Each day targets a specific psychological stage in the buyer’s journey. Don’t skip days or combine two jobs into one email — that’s where sequences fall apart.
- Day 1 — Welcome + Value Delivery. Deliver exactly what you promised (the lead magnet, the coupon, the resource). Keep it short. No pitch. Subject line formula: “[First Name], here’s [what they asked for].” Open rate expectation: 45–60%.
- Day 2 — The Origin Story. Share why your company or product exists. This is credibility-building, not selling. One story, one insight, one soft CTA to visit your most useful content. This email gets forwarded more than any other in the sequence.
- Day 3 — Address the Biggest Objection. What’s the #1 reason people don’t buy? Tackle it head-on. If it’s price, explain ROI with specific numbers. If it’s trust, lead with a case study or proof point. Be direct — readers respect it.
- Day 4 — Social Proof. One customer story, one testimonial, or one data point that shows real results. Specificity sells: “We helped [Company X] increase trial-to-paid conversion by 34% in 60 days” beats “Our customers love us.”
- Day 5 — Second Objection + Feature Spotlight. Address your second most common objection. Pair it with the specific feature or benefit that resolves it. Include a direct CTA to your conversion goal for the first time in the sequence.
- Day 6 — Urgency or Scarcity (if applicable). If you have a legitimate reason for urgency (offer expires, cohort closes, limited seats), this is where it goes. If you don’t, use a “missed insights” angle — remind them what they’ll miss by not acting. Never manufacture false urgency.
- Day 7 — Final Ask. The most direct email in the sequence. Clear offer, clear CTA, clear deadline. Keep it under 150 words. Subject line: something that signals finality — “Last chance” or “Closing the loop on [topic].”
Step 4: Write Each Email Using the One-Job Rule
Every email in your drip has one job. One message. One call to action. This isn’t minimalism for its own sake — it’s conversion science. Multiple CTAs in a single email reduce click-through rates by up to 42%, according to WordStream research.
- Write subject lines last. Once you know exactly what the email does, subject lines write themselves. Aim for 6–10 words, avoid spam triggers (ALL CAPS, excessive punctuation), and test curiosity vs. benefit-forward variants.
- Keep body copy under 200 words for Days 1–3 and Day 7. Days 4–6 can run longer if the story or proof requires it — but never pad. If you can cut a sentence without losing meaning, cut it.
- Use a single, button-style CTA. Text links get clicked, but a visually distinct button gets clicked more often — especially on mobile, where 60%+ of emails are now opened (Litmus, 2024).
- Personalize beyond first name. Dynamic content blocks that reference the subscriber’s segment, their entry point (“Since you downloaded our pricing guide…”), or their behavior (“You haven’t started your trial yet…”) consistently lift conversion rates 15–25% vs. static copy.
- Write a preview text that adds to the subject line, not repeats it. The preview text is 40–90 characters of free real estate. Use it to tease what’s inside, not echo the subject.
Step 5: Build the Automation Workflow
This is where your sequence becomes a system. The workflow is the engine — it determines who gets what email, when, and under what conditions.
- Choose your starting trigger. Common triggers include: form submission, tag added, list joined, product purchased, page visited (requires tracking pixel or event). Your trigger must fire reliably — test it manually before attaching emails.
- Set up the linear sequence first. Before adding any branching logic, connect all 7 emails in order with their delays. This is your baseline. Make sure the complete journey works end-to-end.
- Add exit conditions. Every workflow needs exit rules: if a contact converts (purchases, books, signs up), they should exit the sequence immediately. Failing to set this is the most common workflow mistake — and it destroys trust when someone receives a “still haven’t bought?” email the day after purchasing.
- Add conditional branches for engagement. A basic branch: if a contact opens Day 3 but doesn’t click, send a follow-up variant at Day 3.5. If they click, move directly to Day 4. This alone can lift sequence-level conversion rates by 18–25%.
- Set up goal tracking. Most automation platforms let you define a “goal” event (a URL visit, a tag, an external webhook). When a contact triggers the goal, the workflow marks it as converted and can route them to a post-conversion sequence.
If you’re building this workflow visually, the guide on designing marketing automations with a visual workflow builder covers drag-and-drop construction, branching logic patterns, delay configuration, and error handling in detail — with implementation screenshots for each stage.
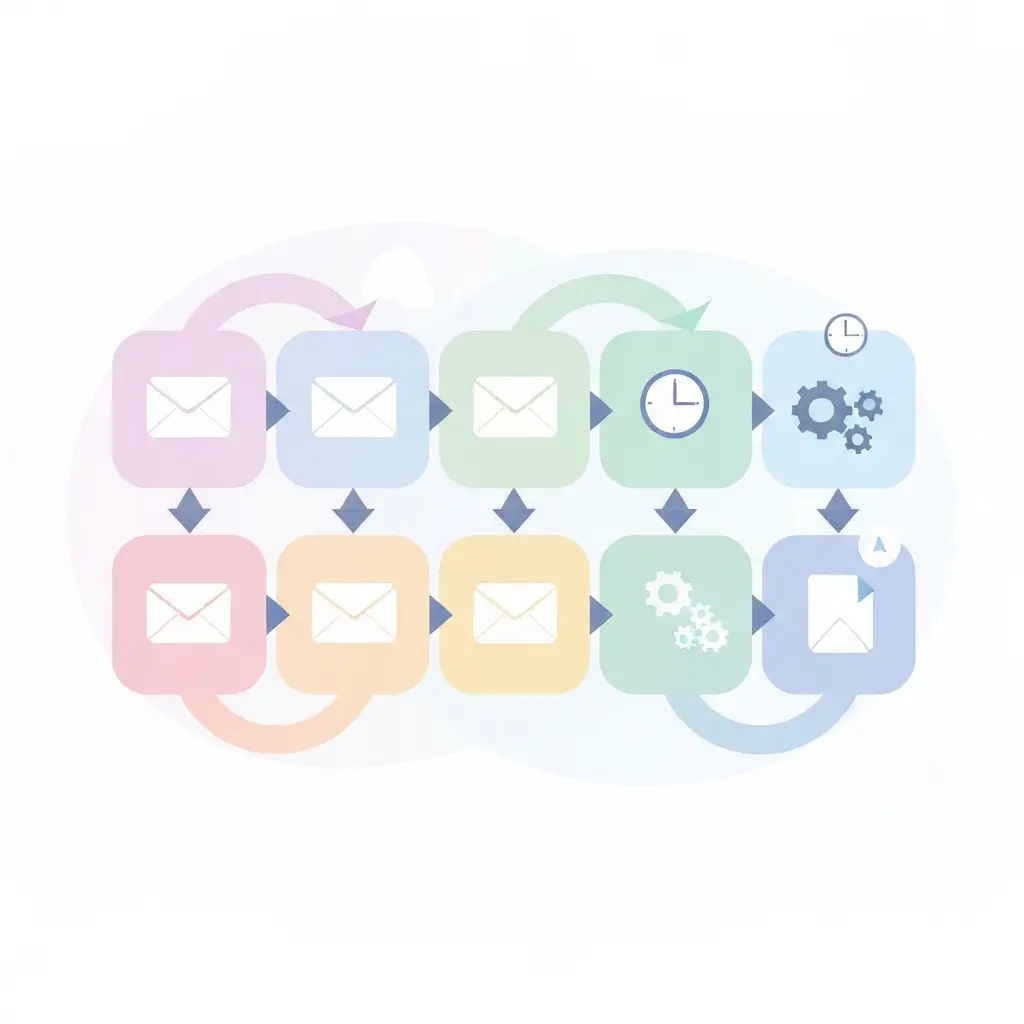
Tools like CampaignOS include a drag-and-drop workflow builder that handles all of this natively — triggers, delays, conditional branching, and goal tracking — across email, SMS, push notifications, and more from one interface. If you’re building multi-channel sequences (email + push notification reminders, for example), this matters more than most single-channel tools let on. You can explore CampaignOS here to see how these workflow patterns map to actual builds.
Step 6: Set Triggers, Delays, and Conditional Branching
The gap between an average drip and a converting one often lives entirely in delay timing and branch conditions. Get this wrong and you’re either overwhelming subscribers or going silent at the exact moment they’re ready to act.
- Set delays based on behavior, not just time. A time-based delay says “send Day 2 email 24 hours after Day 1.” A behavior-based delay says “send Day 2 email 24 hours after Day 1 IF the subscriber opened Day 1, otherwise wait 48 hours and resend Day 1 with a different subject line.” Behavior-based delays consistently outperform time-only setups.
-
Use these delay defaults as a starting point:
- Day 1: Immediately after trigger (within 5 minutes)
- Day 2: 22–24 hours after Day 1
- Day 3: 48 hours after Day 2 (give them a breather)
- Day 4: 24 hours after Day 3
- Day 5: 24 hours after Day 4
- Day 6: 48 hours after Day 5
- Day 7: 24 hours after Day 6
- Set up a “re-engagement branch” at Day 4. If a contact hasn’t opened any email by Day 4, trigger a simplified re-engagement email with a plain-text format (no images, no buttons) and a single question: “Is this still relevant for you?” Responses to plain-text emails improve deliverability for future sends.
- Cap send times to business hours in the subscriber’s timezone. Sending at 3:47 AM local time is a deliverability and open-rate killer. Most automation platforms support timezone-based delivery. Enable it.
- Configure suppression lists. Anyone who’s complained, hard-bounced, or unsubscribed in the last 30 days should be suppressed from entry. This is table stakes for inbox placement.
Step 7: QA Test Before You Launch
Fair warning: this step takes longer than you think. Plan 60–90 minutes for a thorough QA pass. The cost of launching broken is far higher than the cost of testing carefully.
- Send every email to yourself first. Check rendering on desktop and mobile. Check that every link works and goes to the correct destination. Check that personalization tokens render correctly — a “Hello, {first_name}” in a live email ends campaigns immediately.
- Create a test contact and run the full workflow end-to-end. Add a fake subscriber with a real email address you control, trigger the workflow, and confirm every email arrives in the correct order with the correct delay. Do not skip this.
- Test the exit condition. While your test is running, manually trigger the conversion event (visit the goal URL, add the goal tag). Confirm that the workflow stops sending and the contact is correctly marked as converted.
- Test conditional branches. Deliberately open some emails and ignore others in your test account to confirm that branching logic fires correctly. This is the step most people skip — and the one that causes the most post-launch disasters.
- Run a spam filter check. Tools like Mail-Tester.com score your email against major spam filters before you send to real subscribers. Aim for a score of 9.0 or above. Common issues: missing plain-text version, broken unsubscribe link, excessive image-to-text ratio.
- Verify your unsubscribe link and preference center. This isn’t optional — it’s legally required under CAN-SPAM (US), GDPR (EU/UK), CASL (Canada), and Australia’s Spam Act. One-click unsubscribe must work in every single email.
Expected outcome of Step 7: Zero broken links, correct personalization in all emails, confirmed workflow sequencing and exit logic, spam score of 9.0+, and a verified unsubscribe path.
How to Monitor and Optimize During the 7 Days
Launching isn’t the finish line — it’s the starting gun for optimization. Here’s exactly what to watch and when.
Daily Metrics Checklist (Days 1–7)
- Open rate per email. If open rate drops below 20% on any email, check your subject line and preview text. A subject line A/B test on Day 3–4 can recover a faltering sequence mid-flight on most platforms.
- Click-through rate (CTR). Track CTR separately from click-to-open rate (CTOR). A high open rate with low CTR means your subject line works but your email body doesn’t. The opposite means the email is compelling but the subject line is misleading — which hurts long-term list health.
- Unsubscribe rate per email. A spike on any individual email (above 0.5%) usually signals a relevance mismatch — the email didn’t match what the subscriber expected. Look at the email that preceded it, not just the one generating unsubscribes.
- Conversion rate (sequence-level). Calculate this as: total conversions ÷ unique contacts who entered the sequence. Track daily cumulative conversions against your goal baseline.
- Bounce rate. Hard bounces above 2% indicate list quality issues and will damage your sender reputation. Remove hard bounces immediately and investigate the source of bad addresses.
Email Drip Campaign Benchmarks: What Good Looks Like
Benchmarks only matter in context. A 40% open rate for a cold outreach sequence is exceptional. The same rate for a post-purchase sequence is merely average. Use these numbers as directional guides, not absolute targets.
| Metric | Below Average | Average | Strong Performance |
|---|---|---|---|
| Open Rate | <20% | 20–35% | 35%+ |
| Click-Through Rate | <1.5% | 2–4% | 5%+ |
| Unsubscribe Rate | >0.5% per email | 0.1–0.3% | <0.1% |
| Sequence Conversion Rate | <1% | 2–4% | 5–10% |
| Spam/Complaint Rate | >0.08% | 0.02–0.05% | <0.01% |
Source: Mailchimp Email Marketing Benchmarks 2024, Litmus Email Client Market Share 2024, Campaign Monitor Global Email Benchmarks 2024.
Switching Platforms? What to Do Before You Launch
This section is for teams who are building their first drip campaign on a new platform — or who are migrating mid-stream from a tool like Mailchimp. Platform migrations at the wrong moment can break live sequences, orphan contacts, and tank sender reputation in ways that take months to recover.
The short version: if you’re switching platforms, complete the migration before you launch the drip. Running a sequence across two platforms simultaneously is a support nightmare and a deliverability risk.
Key pre-launch migration steps:
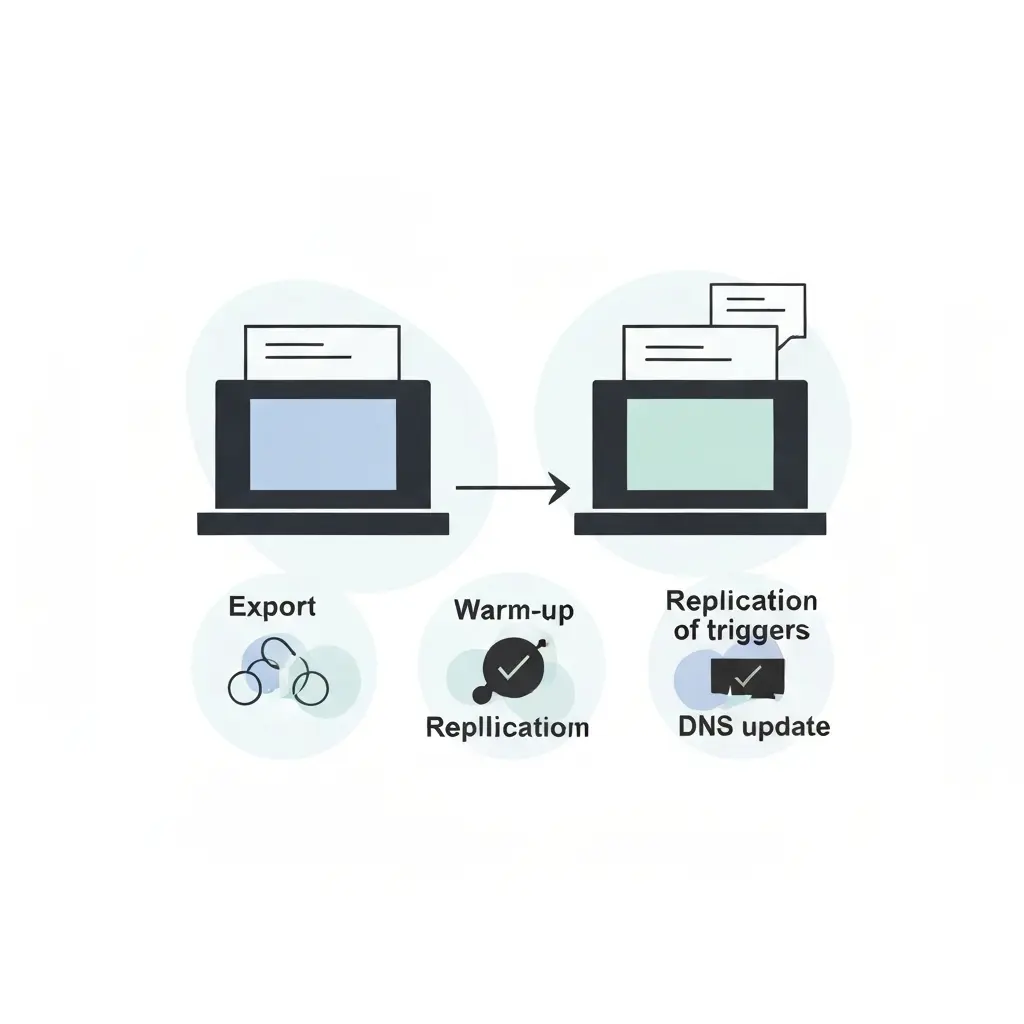
- Export your contacts with all custom fields, tags, and segments intact. Don’t export just email addresses — export the behavioral data that makes segmentation possible. Most platforms export this as a CSV with custom columns.
- Warm up your new sending domain for at least 2 weeks before launching any sequence. Send small batches of highly engaged subscribers first. Jumping straight to a 7-day drip with a cold IP is a direct path to the spam folder.
- Replicate all automation triggers and logic in the new platform before decommissioning the old one. Run both side by side for 48–72 hours on test contacts to confirm parity.
- Update your SPF, DKIM, and DMARC DNS records for the new sending domain. Without these, your emails will fail authentication checks with Gmail and Outlook — which means dramatically reduced inbox placement.
If you’re moving away from Mailchimp specifically, the step-by-step guide on migrating from Mailchimp to open-source email marketing covers the full cutover checklist — including how to export automations, preserve list hygiene, and avoid the deliverability dips that catch most teams off guard.
Ready to build your 7-day drip campaign?
CampaignOS gives you a visual workflow builder, dynamic segmentation, A/B testing, and multi-channel automation — all from one open-source platform you control.
Email, push notifications, SMS, WhatsApp, Telegram, and on-site personalization — all triggered by the same drip logic you just built.
Keep Building: Related Guides
- How to segment your audience for email marketing: the 2026 playbook — advanced segmentation models for higher-relevance drip sequences
- Visual workflow builder for marketing: how to design automations in 2026 — implementation patterns and screenshots for building the workflows in this guide
- Migrating from Mailchimp to open-source email marketing — full cutover checklist for teams switching platforms before launch
Frequently Asked Questions
How many emails should a drip campaign have?
Most high-converting drip campaigns run 5–12 emails. A 7-email sequence is the sweet spot for most B2B and SaaS use cases — long enough to build trust and address objections, short enough to avoid subscriber fatigue. The right number depends on your sales cycle length: a $20 e-commerce product typically needs 3–5 emails, while a $500/month SaaS product often needs 7–10.
What is a good conversion rate for an email drip campaign?
A good sequence-level conversion rate for a targeted drip campaign is 3–8%, depending on your industry, offer, and price point. Welcome sequences for SaaS free trials typically convert at 4–7%, while re-engagement sequences for cold subscribers convert at 1–2%. Anything above 5% on a cold or semi-warm list with a paid offer is genuinely strong performance.
What’s the difference between a drip campaign and a nurture sequence?
A drip campaign is time-based — emails go out on a fixed schedule regardless of subscriber behavior. A nurture sequence is behavior-based — emails are triggered or modified based on what the subscriber does (opens, clicks, visits). In practice, most modern “drip campaigns” combine both approaches: a time-based spine with behavior-triggered branches. The term “drip” is often used interchangeably with “automated email sequence” in the industry.
How do I set up an email drip campaign in marketing automation software?
The setup process has five core steps: (1) define your entry trigger (form submission, tag, event), (2) create each email and map it to a day in the sequence, (3) build the workflow by connecting emails with delay steps, (4)