How to Set Up Marketing Automation: A Practical 2026 Walkthrough
Learning how to set up marketing automation is one of the highest-leverage moves a marketer or small business owner can make in 2026. Done right, a handful of automated workflows replaces dozens of manual tasks — welcome new subscribers, recover abandoned carts, re-engage dormant contacts — all without lifting a finger after the initial setup. This walkthrough skips the theory and takes you through every step: prerequisites, platform selection, list setup, segmentation, trigger configuration, your first three workflows, and analytics.
This guide is deliberately platform-agnostic for the first five steps. Whether you are using Mailchimp, ActiveCampaign, or an open-source alternative, the architecture is the same. The final section shows how to execute the same setup inside CampaignOS in under an hour.
1. Prerequisites Before You Start
Rushing into a platform without laying the groundwork is the single most common reason automation projects stall. Complete these four prerequisites first.
Verify your sending domain
Every major inbox provider — Gmail, Outlook, Apple Mail — filters mail based on SPF, DKIM, and DMARC records. Without all three in place, your automated emails will hit spam before a single subscriber reads them. Log into your DNS provider and add:
- SPF record: a TXT record authorising your sending platform’s mail servers (e.g.
v=spf1 include:sendgrid.net ~all) - DKIM record: a CNAME or TXT key provided by your email platform
- DMARC record: at minimum
v=DMARC1; p=none; rua=mailto:dmarc@yourdomain.comto start collecting reports
DNS propagation takes up to 48 hours. Start here, not last.
Define one measurable goal per workflow
Automation without a success metric becomes a set-and-forget liability. Before building anything, write down: “This workflow succeeds if X% of contacts do Y within Z days.” Common examples: 25% of new subscribers click a product link within 7 days, or 10% of lapsed contacts make a purchase within 14 days of a win-back sequence.
Audit your current contact data
Import a dirty list and you will automate noise. Export your existing contacts and check for: duplicate email addresses, invalid formats, contacts who have not opened an email in over 12 months, and missing fields you plan to use for personalisation (first name, signup source, purchase history). Clean the list before migration, not after.
Map the customer journey
Sketch three stages on a whiteboard: Awareness (new subscriber), Consideration (has browsed or engaged), Decision (cart added or trial started). Your first three workflows will map to these three stages exactly.
2. Tool Selection: What to Look For
The right platform depends on your technical comfort, contact volume, and channel mix. Use this comparison to shortlist your options before committing.
| Criterion | Beginner | Growing Business | Technical Team |
|---|---|---|---|
| Visual workflow builder | Required | Required | Nice to have |
| Multi-channel (email + SMS + push) | Optional | Important | Required |
| Behavioural triggers | Basic | Advanced | Advanced + API |
| Per-contact pricing | Acceptable | Watch carefully | Avoid if scaling fast |
| GDPR / consent management | Required | Required | Required |
For a detailed breakdown of free-tier options, see Best Free Marketing Automation Platforms Compared in 2026. If you want to understand the underlying architecture before choosing, What Is Marketing Automation and How Does It Work? covers the mechanics in depth.
3. List Setup and Contact Import
A well-structured contact list is the foundation every workflow runs on. Follow this sequence to avoid rebuilding your structure three months in.
Choose a single-list model
Most modern platforms use a single master list with tags and custom fields rather than multiple siloed lists. This prevents contacts appearing in multiple lists and receiving duplicate emails. Create one audience or contact database, then use tags to differentiate contact types (e.g. lead, customer, trial-user).
Define your custom fields upfront
Before importing, decide which fields you need for personalisation and segmentation. Common fields beyond the defaults:
- Signup source (organic, paid, referral)
- Industry or company size (B2B)
- Last purchase date
- Lifetime value tier (low / mid / high)
- Opt-in date (essential for GDPR audit trails)
Import and tag on import
When uploading a CSV, apply an import tag such as imported-2026-04 alongside any existing status tags. This gives you a clean audit trail and lets you exclude historical imports from sequences designed for fresh opt-ins.
4. Segment Definition
Segmentation is what turns broadcast email into automation that feels personal. Build these four foundational segments before writing a single workflow.
New subscribers (0–7 days)
Filter: Opt-in date is within the last 7 days AND no purchase tag. These contacts enter your welcome sequence.
Engaged non-buyers
Filter: Has opened at least one email in the last 30 days AND no purchase tag. These contacts are warm — they are ready for a conversion-focused nurture sequence.
Recent buyers
Filter: Purchase tag present AND last purchase within 90 days. Exclude from promotional sequences; enrol in post-purchase or upsell flows instead.
Dormant contacts
Filter: No email open in 90+ days AND no purchase in 90+ days. These contacts enter your win-back sequence. Anyone who does not re-engage after the win-back sequence should be suppressed to protect your sender score.
For advanced segmentation techniques including lead scoring, see How to Connect n8n with CampaignOS for Advanced Marketing Workflows 2026.
5. Trigger Configuration
Triggers are the conditions that fire a workflow. There are four categories every marketer needs to understand.
- Form submission trigger: Contact submits an opt-in form → enters welcome sequence. This is event-based and fires in real time.
- Date-based trigger: Scheduled workflows that fire at a specific time, such as a 30-day re-engagement check or a monthly newsletter broadcast.
- Behavioural trigger: Contact visits a pricing page, clicks a specific link, or abandons a cart. Requires tracking script on your website.
- Tag-based trigger: A tag is applied to a contact (manually or via API) → fires a corresponding workflow. Extremely flexible for integrations.
Install your platform’s tracking script on every page of your website before configuring behavioural triggers. Without it, cart abandonment and browse abandonment flows cannot fire.
6. Your First Three Workflows
Start with these three. They cover the highest-value moments in the customer lifecycle and give you enough data to optimise within 30 days.
Workflow 1: Welcome Sequence
Trigger: Form submission (opt-in) or tag new-subscriber applied.
Goal: Deliver your lead magnet, introduce your brand, and drive a first click to a key product or content page.
| Send time | Subject line goal | CTA | |
|---|---|---|---|
| Email 1 | Immediately | Deliver lead magnet + confirm opt-in | Download / access resource |
| Email 2 | Day 2 | Introduce brand story and differentiation | Read top blog post or case study |
| Email 3 | Day 5 | Deliver social proof (testimonials, results) | View product / start free trial |
| Email 4 | Day 8 | Overcome objections + direct offer | Buy / upgrade / book demo |
Add a conditional branch after Email 3: if the contact clicks the product link, apply tag high-intent and move them to your sales sequence. If they do not click, continue to Email 4 with a softer touch. For a full deep-dive on welcome sequence structure and copy, see How to Build a Welcome Email Sequence Step by Step 2026.
Workflow 2: Cart / Form Abandonment
Trigger: Behavioural — contact visits checkout or pricing page and does not complete the action within 1 hour.
Goal: Recover the 70%+ of users who leave without converting (industry average abandonment rate in 2026 is 72% across ecommerce and SaaS).
- Email 1 — 1 hour after abandonment: “Did something go wrong?” — friendly, no hard sell. Link back to the abandoned cart or pricing page.
- Email 2 — 24 hours after abandonment: Reinforce the value proposition and address the top objection (price, complexity, trust).
- Email 3 — 72 hours after abandonment: Urgency + incentive (10% discount, free onboarding call, extended trial). Exit the sequence whether or not they convert.
Set an exit condition: if the contact completes a purchase at any point, remove them from the abandonment flow immediately and apply tag customer.
Workflow 3: Win-Back Campaign
Trigger: Segment membership — contact has not opened an email or made a purchase in 90 days.
Goal: Re-engage 10–15% of dormant contacts before permanently suppressing the rest to protect deliverability.
- Email 1 — Day 0: “We miss you” — personal tone, no image-heavy design (plain text performs better for re-engagement).
- Email 2 — Day 5: Share what has changed — new features, new content, or a compelling offer.
- Email 3 — Day 10: Last chance — “Should we keep sending you emails?” with a one-click reconfirm link.
- Day 11: Anyone who did not click any link in the sequence gets tag
suppressedapplied and exits all future flows.
Re-engagement campaigns and the full suppression workflow are covered in detail at How to Create a Re-Engagement Campaign for Dormant Contacts 2026.
7. Analytics Setup
Automation without measurement is guesswork. Configure these four data points on day one.
Per-workflow metrics
For every workflow, track: open rate, click-through rate, conversion rate (goal completion), and unsubscribe rate. Set up a simple dashboard — a spreadsheet is fine at the start — with weekly snapshots. Your benchmark targets for 2026:
- Welcome sequence open rate: 45–60% (Email 1), declining to 30–40% by Email 4
- Abandonment sequence recovery rate: 5–15% of abandoners
- Win-back re-engagement rate: 8–12% of dormant contacts
UTM parameters on every link
Every link in every automated email should carry UTM parameters so Google Analytics (or your analytics platform) attributes conversions correctly. Minimum structure: utm_source=email&utm_medium=automation&utm_campaign=welcome-sequence&utm_content=email-1-cta.
Revenue attribution
Connect your automation platform to your ecommerce or CRM system so you can see revenue generated per workflow, not just clicks. Most platforms support this natively or via Zapier / n8n webhook.
List health metrics
Check monthly: overall list growth rate, monthly unsubscribe rate (healthy is under 0.5%), spam complaint rate (keep below 0.08% to avoid Gmail/Yahoo bulk sender penalties), and bounce rate (hard bounces above 2% trigger deliverability issues). For full campaign analytics guidance, see Campaign Performance Tracking: Metrics That Matter in 2026.
8. Set It Up with CampaignOS
CampaignOS (app.campaignos.site) brings all seven steps above into a single interface with no per-contact pricing caps. Here is the fastest path to a live automation stack.
Step 1 — Domain setup (5 min)
Go to Settings → Sending Domains and add your domain. CampaignOS generates your SPF, DKIM, and DMARC records automatically. Paste them into your DNS panel and click Verify. The platform checks propagation and shows a green status when ready.
Step 2 — Import your list (10 min)
Navigate to Contacts → Import. Upload your cleaned CSV and map fields to CampaignOS contact properties. Apply an import tag on the same screen. Duplicate detection runs automatically on import.
Step 3 — Build your segments (5 min)
Under Contacts → Segments, create the four foundational segments from Step 4 above using CampaignOS’s filter builder. Filters update dynamically — contacts move between segments automatically as their behaviour changes.
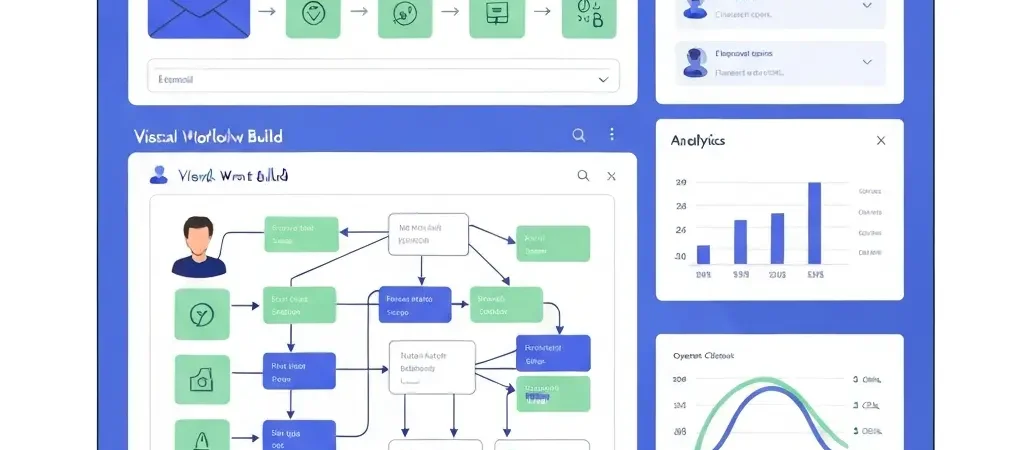
Step 4 — Build your first workflow (20 min)
Go to Automations → New Workflow. Select your trigger (Form Submission for the welcome sequence), drag in your email steps, configure delays, and add conditional branches using the visual workflow builder. Each email node links to a template in the drag-and-drop builder. For inspiration, CampaignOS ships with welcome, abandonment, and win-back templates pre-built — activate and customise rather than starting blank.
Step 5 — Connect analytics (5 min)
Under Settings → Integrations, connect Google Analytics 4 via the native GA4 integration, or send events to any analytics tool via webhook. CampaignOS auto-appends UTM parameters to every link if you enable the toggle in the workflow editor.
FAQ
How long does it take to set up marketing automation for the first time?
Most marketers can complete domain verification, list import, and a live welcome sequence in 2–4 hours on their first attempt. The abandonment and win-back workflows add another 2–3 hours each. Expect to spend a full day to launch all three workflows end-to-end, including testing. The analytics setup adds another 30–60 minutes if you are connecting a CRM or ecommerce platform.
Do I need a developer to set up marketing automation?
No. Modern platforms including CampaignOS use visual workflow builders that require no coding. You will need access to your DNS panel to add SPF, DKIM, and DMARC records (a 10-minute task), and you will need to install a tracking script on your website for behavioural triggers — which is usually a copy-paste operation in your CMS or tag manager.
What is the difference between a trigger and a segment in marketing automation?
A trigger is an event that starts a workflow — a form submission, a page visit, or a tag being applied. A segment is a dynamic group of contacts that meet defined criteria at any given moment. Triggers fire once per qualifying event; segments update continuously. You can use both together: a trigger fires when a contact enters a segment (e.g. “Contact joins the Dormant segment → start win-back workflow”).
How many emails should be in a welcome sequence?
Three to five emails is the optimal range for most businesses. Email 1 delivers the lead magnet and confirms the opt-in. Emails 2–3 build relationship and trust. Emails 4–5 move toward conversion. Sequences longer than five emails see diminishing open rates unless they deliver genuinely new value in each message. For ecommerce, three emails over eight days is a strong starting point.
What is the best way to avoid spam filters in automated emails?
The five most impactful steps: (1) authenticate your domain with SPF, DKIM, and DMARC before sending anything; (2) suppress non-engagers regularly — send only to contacts who have opened or clicked in the last 90–180 days; (3) maintain a hard bounce rate below 2%; (4) avoid spam-trigger words in subject lines (free, guaranteed, act now); (5) use a dedicated sending domain or subdomain rather than your primary business domain. For a full deliverability guide, see Email Deliverability Troubleshooting Guide 2026.
Is marketing automation worth it for small businesses with fewer than 1,000 contacts?
Yes — and small lists often see the highest ROI from automation. With fewer than 1,000 contacts, a welcome sequence with a 50% open rate and 5% conversion rate on a $100 product generates meaningful revenue from a setup that takes a few hours. The effort-to-return ratio is better at small scale because personalisation is more authentic and deliverability is easier to maintain.
How often should I review and update my automation workflows?
Do a full workflow audit every 90 days. Check: open and click rates against benchmarks, whether subject lines still reflect your current positioning, whether links still resolve correctly, and whether the offer in conversion-focused emails is still competitive. Do micro-reviews monthly — just check that workflows are firing correctly, bounce rates are healthy, and no workflow has accumulated a large number of contacts stuck in an error state.