How to Set Up Marketing Automation in 7 Days: 7-Step Plan
Marketing automation setup feels overwhelming until you break it into daily tasks. Most teams either rush the process — and build workflows that break in week two — or over-plan and never ship anything. This 7-day plan gives you a clear, executable path from platform selection to live email drip campaigns, without wasting a single afternoon on configuration rabbit holes.
Difficulty: Beginner–Intermediate | Time per day: 1–3 hours | Prerequisites: A contact list (even 50 people), a goal (lead nurturing, onboarding, or re-engagement), and access to an automation platform.
According to Ascend2’s 2024 State of Marketing Automation report, 63% of marketers cite improving lead nurturing as their top automation objective — yet fewer than half have a documented setup process. That’s the gap this plan closes.
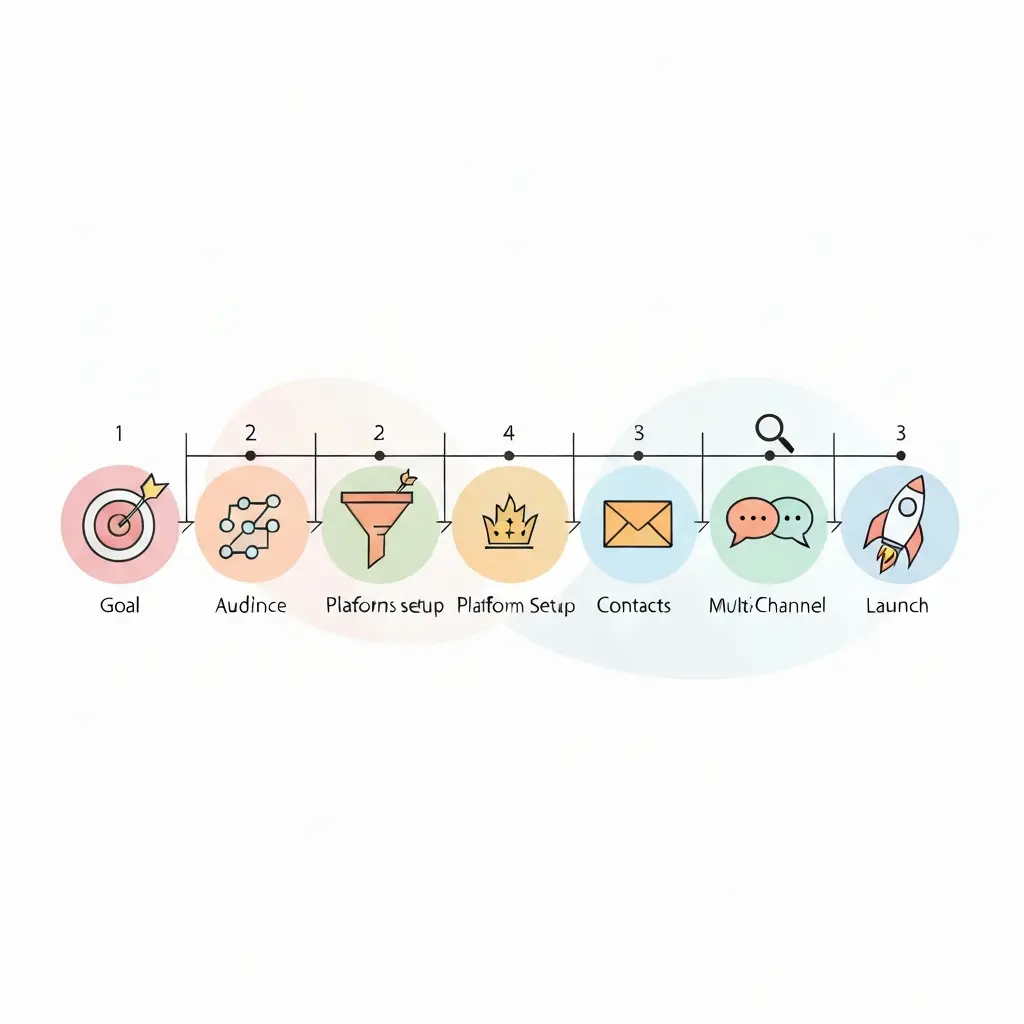
Day 1 — Define Your Goal and Target Audience
Everything downstream — your segments, your drip sequences, your channel choices — flows from one decision made on Day 1: what is the single outcome this automation is supposed to produce?
Here’s where most teams stumble. They build automation “for email marketing” rather than automation to convert free trial users into paid customers within 14 days. Vague goals produce vague workflows that produce vague results.
Day 1 Tasks
- Pick one primary goal. Choose from: lead nurturing, welcome/onboarding, abandoned cart recovery, re-engagement, or post-purchase follow-up. One goal per workflow — always.
- Define your audience in one sentence. Example: “New subscribers who signed up in the last 7 days and haven’t booked a demo.” That specificity shapes every message you’ll write.
- Map the entry trigger. What action starts someone into this workflow? Form submission, tag applied, purchase made, or page visited? Write it down.
- Set a success metric. Decide now: are you measuring open rate, click-through rate, conversion to purchase, or something else? You can’t optimize what you don’t define.
- Sketch a 3-box flow on paper. Trigger → Message → Outcome. Keep it simple. Complexity comes later.
Expected outcome: A one-page brief with your goal, audience definition, entry trigger, and success metric. This becomes your North Star for the next six days.
Day 2 — Configure Your Marketing Automation Platform
Platform configuration sounds technical, but the real work here is connecting your data sources so your automation has something to act on.
Day 2 Tasks
- Choose your platform. For most teams starting out, ActiveCampaign and HubSpot both have strong visual workflow builders. If you want full data ownership with self-hosted infrastructure, CampaignOS runs on Vercel with PostgreSQL and supports email, SMS, WhatsApp, Telegram, push, and on-site channels from one dashboard.
- Connect your email sending domain. Authenticate SPF, DKIM, and DMARC records. This step takes 20–30 minutes and protects your deliverability. Don’t skip it.
- Install the tracking script on your website. Paste the snippet before the closing
</body>tag. This enables behavioral triggers — page visits, form fills — later in the week. - Connect your CRM or contact source. Sync your existing contact database via CSV, native integration, or API. Even a spreadsheet export works on Day 2.
- Create one custom field. Add a field that matches your audience definition — for example, “Trial Start Date” or “Lead Source.” You’ll use it for segmentation tomorrow.
For a deeper walkthrough of platform selection and initial configuration, the complete beginner’s guide to marketing automation setup covers every configuration check in detail.
Expected outcome: An authenticated sending domain, website tracking live, and contacts connected. Your platform is ready to receive real data.
Day 3 — Import Contacts and Build Your First Segments
Segmentation is where marketing automation earns its ROI. Sending the same message to every contact is just expensive spam.
What most people miss: you don’t need dozens of segments on Day 3. You need two or three clean ones that match the goal you defined on Day 1.
Day 3 Tasks
- Import your contact list. Upload your CSV with first name, email, and any custom fields you defined on Day 2. Map columns carefully — mismatched fields break personalization tokens later.
- Clean the list first. Remove duplicates, invalid emails, and any contacts who’ve previously unsubscribed. A clean list of 500 outperforms a messy list of 5,000.
- Create your primary segment. Build a dynamic segment based on your audience definition from Day 1. Example rule: “Contact created in last 7 days AND trial_status = active AND demo_booked = false.”
- Create one re-engagement segment. Tag contacts who haven’t opened an email in 90+ days. You won’t use this segment this week, but having it ready saves time later.
- Test your segment logic. Preview the contact count. If it returns zero or your entire list, your rules need adjustment. Aim for a meaningful but focused subset.
Dynamic segments update automatically as contacts meet or stop meeting your criteria — that’s what separates a real automation workflow from a one-time blast. The 2026 audience segmentation playbook for email marketing covers advanced segment types including behavioral, RFM, and predictive scoring models.
Expected outcome: A clean contact list with at least one precise dynamic segment that matches your Day 1 audience definition.
Day 4 — Build Your First Email Drip Campaign
An email drip campaign is a pre-written sequence of emails sent automatically based on time delays or contact behavior. Day 4 is when your marketing automation setup becomes tangible — you’re no longer configuring infrastructure, you’re building the thing contacts will actually experience.
Day 4 Tasks
- Plan a 3-email sequence minimum. Email 1: Welcome and set expectations (sent immediately). Email 2: Deliver your primary value (Day 2–3). Email 3: Call to action — one clear ask (Day 5–7). Three emails is enough to launch; extend the sequence after you see results.
- Write Email 1 first. Subject line under 50 characters. First sentence references what they just did (signed up, downloaded, purchased). Keep the body under 150 words. One link only.
- Build the workflow trigger. Set the entry condition to match your segment. Use your platform’s visual builder to connect the trigger → Email 1 → delay → Email 2 → delay → Email 3.
- Set timing delays deliberately. Industry data from HubSpot’s drip campaign research shows 24–48 hour gaps between early emails work well for B2B, while 3–7 day gaps suit longer sales cycles. Match your delay to your audience’s decision timeline.
- Add one personalization token per email. At minimum, use the first name. If you have behavioral data, reference what the contact did: “You signed up for [plan name]” performs better than generic copy.
For ready-to-use email templates, timing benchmarks, and conversion tactics, the step-by-step guide to creating an email drip campaign in 2026 has everything you need to build and measure sequences that convert.
Expected outcome: A 3-email drip sequence built in your workflow editor, connected to your Day 3 segment, with timing delays configured.
Drip Campaign Timing by Use Case
| Use Case | Emails in Sequence | Recommended Delay Between Emails | Primary Goal |
|---|---|---|---|
| Welcome / Onboarding | 3–5 | 1–2 days | Activation |
| Lead Nurturing (B2B) | 5–8 | 3–5 days | Demo / Consultation booking |
| Abandoned Cart | 2–3 | 1 hour, then 24 hours | Purchase recovery |
| Re-engagement | 2–4 | 7 days | Win-back or unsubscribe |
| Post-Purchase | 3–5 | 2–7 days | Upsell / review request |
Day 5 — Add Multi-Channel Engagement Touchpoints
Email alone gets you part of the way. Multi-channel engagement — combining email with SMS, push notifications, or in-app messages — typically increases conversion rates by reaching contacts in the channel they actually respond to.
Fair warning: don’t try to add every channel at once. Pick one additional channel that matches where your audience spends time.
Day 5 Tasks
- Choose one additional channel based on your audience. SMS works for time-sensitive B2C offers (open rates exceed 90%). Push notifications suit mobile app users. WhatsApp and Telegram work well for high-trust communities. Review Mailchimp’s SMS drip campaign playbook for channel-specific sequence patterns.
- Add a conditional branch to your existing workflow. After Email 2, insert a condition: “If email not opened in 48 hours, send SMS reminder.” This prevents over-messaging contacts who already engaged.
- Write your SMS or push message. SMS: 160 characters, one link, opt-out instruction. Push: 50-character headline, 100-character body, one action button. Shorter than you think you need.
- Set channel-specific frequency caps. No contact should receive more than 2 messages across all channels in a single day. Most platforms let you set this at the account or workflow level.
- Verify consent for each channel. SMS and WhatsApp require explicit opt-in. Don’t assume email consent covers other channels — it doesn’t, legally or practically.
If you’re running CampaignOS, the unified inbox consolidates replies from email, SMS, WhatsApp, Telegram, and push into one view — which means you can see the full conversation thread without switching tools when contacts respond.
Expected outcome: Your Day 4 email workflow extended with one additional channel, triggered conditionally based on email engagement behavior.
Day 6 — Test Every Workflow Before Going Live
Testing is the step that separates a professional automation setup from one that quietly burns your list. One broken personalization token — “Hello {{first_name}}, welcome!” landing in someone’s inbox — costs more credibility than not sending anything at all.
Day 6 Tasks
- Send yourself through the workflow first. Create a test contact with your own email address and manually trigger the entry condition. Follow the sequence in real time and check every email as it arrives.
- Check every personalization token renders correctly. Look for blank fields, literal token names, or garbled characters. Fix the underlying data field, not just the email copy.
- Verify all links work and track correctly. Click every link. Confirm UTM parameters are appended if you’re tracking in Google Analytics. Broken links in automated emails are invisible unless you test them.
- Test the conditional branches. Simulate both paths: a contact who opens Email 1 and a contact who doesn’t. Confirm each contact ends up on the correct path, not stuck in a loop.
- Check mobile rendering for every email. More than 60% of emails are opened on mobile. If your email looks broken on a 375px screen, fix the template before launch.
- Confirm unsubscribe and opt-out paths work. Click the unsubscribe link. Verify the contact is removed from the active segment and suppressed from future sends within 10 seconds of clicking.
Refer to HubSpot Academy’s workflow testing framework for a systematic pre-launch checklist, especially useful if you’re using conditional logic with multiple branches.
Expected outcome: A fully tested workflow where every email renders correctly, all links work, personalization tokens populate from real data, and opt-out paths function as expected.
Day 7 — Launch, Monitor, and Set Up Analytics Tracking
Day 7 isn’t the finish line — it’s the starting line. The goal today is to go live with monitoring in place so you know within 48 hours whether the workflow is performing or needs adjustment.
Day 7 Tasks
- Activate the workflow for real contacts. Switch the workflow from “draft” or “test” mode to live. Confirm the entry trigger is active and the segment is pulling contacts correctly.
- Set up a simple reporting dashboard. Track four metrics at minimum: open rate, click-through rate, conversion rate (whatever your Day 1 success metric was), and unsubscribe rate. Most platforms surface these natively.
- Add UTM parameters to all links if not already done. Use
utm_source=email&utm_medium=automation&utm_campaign=[campaign-name]so you can see downstream behavior in Google Analytics or your analytics platform. - Set a 72-hour review calendar reminder. Check your metrics three days after launch. You’re looking for open rates below 20% (subject line problem), click rates below 2% (copy or offer problem), or unsubscribes above 0.5% (audience mismatch problem).
- Plan your first A/B test. After 100 sends, test one variable: subject line, send time, or CTA button text. Don’t test multiple variables at once — you won’t know what moved the needle.
Expected outcome: A live marketing automation setup with real contacts entering the sequence, analytics tracking configured, and a scheduled review date on your calendar.
Ready to Build on What You’ve Launched?
Now that your first automation is live, the next step is expanding — more segments, more channels, and workflows that respond to real behavior instead of just time delays.
- Read the complete marketing automation setup guide for platform comparison, customer journey mapping, and advanced workflow patterns.
- Use the email drip campaign step-by-step guide to extend your Day 4 sequence with proven templates and conversion benchmarks.
- Deepen your personalization with the audience segmentation playbook — covering behavioral segments, lead scoring, and dynamic content strategies.
- If you want one platform that handles email, SMS, WhatsApp, Telegram, push, and on-site personalization with a visual workflow builder, CampaignOS is free to explore — self-hosted, open-source, and built for exactly this kind of multi-channel setup.
Frequently Asked Questions
How long does marketing automation setup actually take for a small team?
A functional first workflow — entry trigger, 3-email drip sequence, and basic segmentation — takes 7–14 hours spread across 7 days. The biggest time variable is data quality: a clean contact list with consistent fields cuts setup time in half. Complex multi-channel workflows with conditional branching typically take 2–4 weeks for a team of one or two people.
What’s the difference between an email drip campaign and a marketing automation workflow?
An email drip campaign is a timed sequence of pre-written emails sent automatically — it’s linear and time-based. A marketing automation workflow is broader: it can include emails, SMS, wait steps, conditional branches, lead score updates, CRM field changes, and multi-channel messages. Drip campaigns are one type of workflow, not the same thing.
How many emails should a beginner drip campaign include?
Start with 3 emails: a welcome message sent immediately, a value-delivery email at Day 2–3, and a single clear call to action at Day 5–7. Three emails is enough to test your messaging and measure engagement before investing in longer sequences. Extend to 5–8 emails only after you’ve confirmed the 3-email version converts.
Can I set up marketing automation without a developer?
Yes. Modern platforms like ActiveCampaign, HubSpot, and CampaignOS all include visual workflow builders designed for non-technical users. The only step that requires basic technical knowledge is installing a tracking script on your website — which is a one-time copy-paste into your site’s HTML. Everything else is drag-and-drop or form-based configuration.
What metrics should I track in my first week of automation?
Focus on four: open rate (benchmark: 20–30% for most industries), click-through rate (benchmark: 2–5%), conversion rate tied to your specific goal, and unsubscribe rate (anything above 0.5% signals an audience mismatch or frequency problem). Don’t chase vanity metrics in week one — track only what connects directly to your Day 1 success definition.
How do I know if my audience segmentation is too broad or too narrow?
Too broad: your open and click rates look like your general list averages — segmentation isn’t adding personalization value. Too narrow: your segment contains fewer than 50 contacts, which makes it hard to draw statistically meaningful conclusions. A well-defined segment for a first workflow usually contains 100–2,000 contacts with 2–4 shared behavioral or demographic attributes.
What’s the best platform for multi-channel marketing automation?
The best platform depends on your channel needs and data control requirements. HubSpot and ActiveCampaign handle email and SMS well with strong native integrations. For teams needing email, SMS, WhatsApp, Telegram, push, and on-site personalization in a single self-hosted platform, CampaignOS offers all of those channels with a visual workflow builder, dynamic segmentation, and A/B testing — without monthly SaaS fees.