How to Build Marketing Workflow with Automation: 3 Fixes That Actually Work
Most marketing automation setups fail within 90 days — not because the tools are broken, but because the workflow is. Marketers copy a template, hook up a few triggers, and wonder why their drip campaigns get ignored and their segments produce zero lift. The problem isn’t effort. It’s architecture.
This guide breaks down exactly where marketing automation workflows collapse and gives you three concrete fixes — covering email campaign automation, drip campaign structure, segmentation logic, and cross-channel orchestration — that you can apply this week.
Updated for 2025 | Difficulty: Intermediate | Time to implement all three fixes: 4–8 hours across your stack
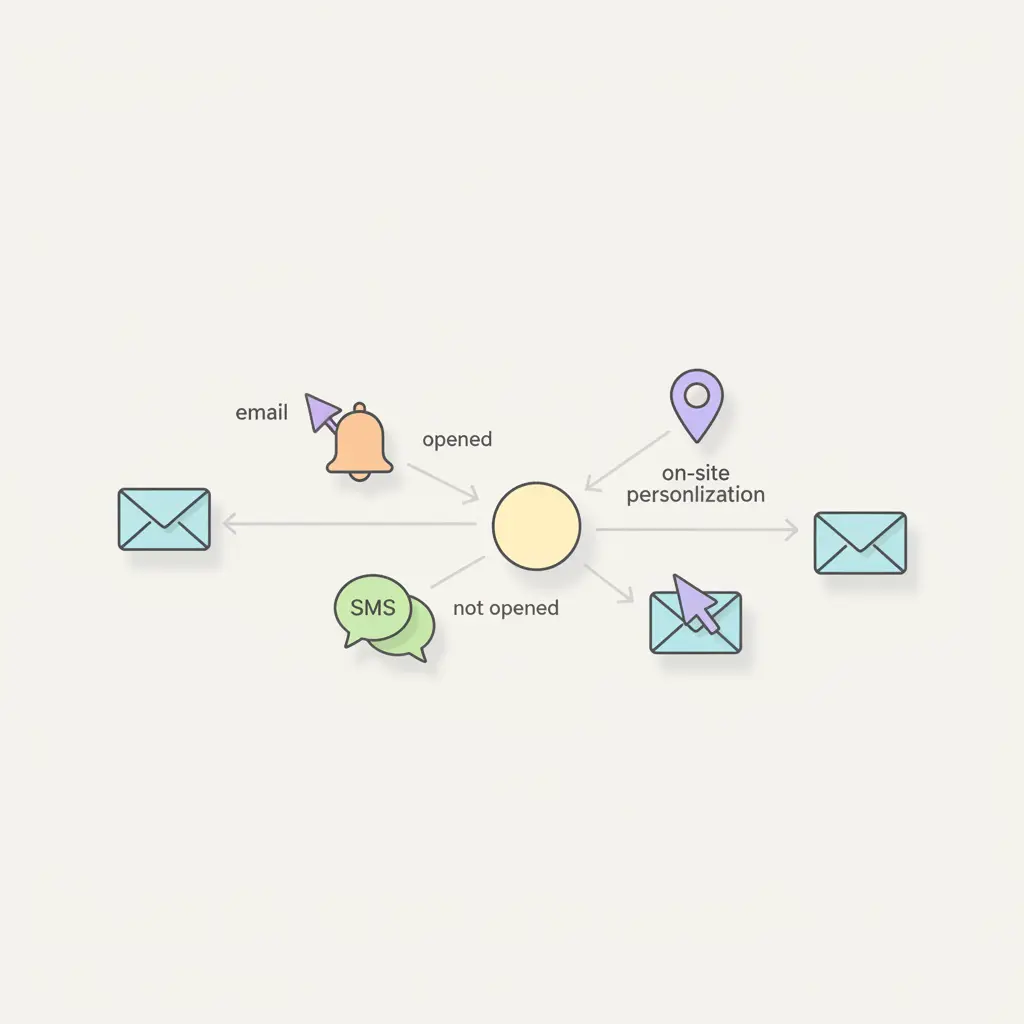
Why Most Marketing Automation Setups Break at the Same Point
Here’s the uncomfortable truth: most email campaign automation is built backwards. Marketers start with a tool, pick a template, and then try to fit their audience into it. That’s like designing a highway for one specific car brand.
According to a 2025 Omnisend ecommerce study, the top 5% of brands drove the majority of automated campaign revenue — meaning the other 95% left significant conversions on the table. The separator wasn’t budget. It was workflow design.
What most broken workflows have in common:
- Triggers fire on a schedule, not on signals. “Send email 3 days after signup” is a guess. “Send email when the user views pricing twice without converting” is a signal.
- Segmentation is applied as an afterthought. The drip campaign runs, then marketers try to explain why open rates differ. The segment should define the campaign, not describe it later.
- Channels operate in silos. Email says one thing. A push notification says something else. The user gets confused — and confusion kills conversion.
These aren’t minor tweaks. They’re foundational. Fix one and you’ll see improvement. Fix all three and your marketing automation setup becomes a revenue engine rather than a message-delivery system.
Fix 1: Replace Time-Based Triggers with Behavior-Based Triggers
Time-based triggers feel logical because they’re easy to plan. But they assume every subscriber is on the same journey at the same pace — and they’re not.
What a behavior-based trigger looks like
Instead of: “Send welcome email 0 days after subscribe → Send email 3 days later → Send email 7 days later”
Try: “Send welcome email on subscribe → IF user clicks product link, send feature deep-dive → IF user doesn’t open in 5 days, send re-engagement with different subject line”
The second workflow reacts to the contact. The first one talks at them regardless of what they’ve done.
How to set up behavior-based triggers: step-by-step
- Map your contact’s key actions. List every meaningful thing a contact can do: email open, click, page visit, form submission, purchase, cart abandonment, login, inactivity for X days. You don’t need to automate all of them — just identify the five or six that correlate with conversion or churn.
- Assign intent scores to each action. Page visit = 1 point. Product page visit = 3 points. Pricing page visit = 5 points. Demo request = 10 points. This is the foundation of lead scoring, and it transforms flat lists into ranked audiences. For a detailed lead scoring and trigger setup walkthrough, see how to set up marketing automation with advanced triggers and lead scoring.
- Create conditional branches for each key action. In your automation platform, every trigger path should fork into at least two branches: one for contacts who took the action and one for those who didn’t. Branching is what separates automation from scheduling.
- Set exit criteria for every workflow. What happens when a contact buys? They should exit the nurture sequence immediately. Failing to set this is how subscribers receive “still thinking about it?” emails the day after purchasing.
- Test trigger timing with a small segment first. Before rolling out to your full list, run the behavior-triggered workflow on 10–15% of subscribers for two weeks. Measure click-through rate and unsubscribe rate versus your old time-based sequence.
Forbes contributors who work in marketing automation consistently cite behavioral triggers as the highest-ROI automation strategy — not because it’s novel, but because most teams still haven’t implemented it properly.
Expected outcome
Teams that switch from time-based to behavior-based triggers typically see a 20–35% lift in email click-through rates within the first campaign cycle. The reason is straightforward: relevant timing beats consistent timing every time.
Fix 2: Segment Your Audience Before You Build the Drip Campaign
Segmentation isn’t a feature you turn on inside your email tool. It’s a decision you make before you write a single subject line. Building a drip campaign and then segmenting it is like building a house and then deciding where the doors go.
The segmentation-first framework
Here’s where it gets interesting: the question isn’t “how should I segment my list?” — it’s “what behavior or attribute changes what I should say to this person?” That reframing is the difference between demographic segmentation (blunt) and behavioral segmentation (sharp).
How to segment before automating: step-by-step
- Identify your core audience splits. Before touching your platform, answer: Does my message change based on where someone is in the funnel? Does it change based on what product category they care about? Does it change based on their company size, role, or purchase history? Each “yes” is a segment boundary.
- Build segments using AND/OR logic. “Opened last 3 emails AND visited pricing page” is a high-intent segment. “Has not opened in 60 days OR unsubscribed from promotional emails” is a re-engagement or suppression segment. Mixing AND/OR logic is where most platforms give you serious power — use it.
- Choose dynamic segments over static lists. Static lists are snapshots. Dynamic segments update in real time as contacts meet or stop meeting criteria. For automated drip campaigns, static lists guarantee your audience goes stale. For a full breakdown of dynamic versus static segment strategies, the 2026 audience segmentation playbook for email marketing covers this in detail.
- Create a suppression segment before launch. This is the segment of people who should NOT receive this campaign: recent buyers, contacts in active sales conversations, anyone who unsubscribed from this message type. Suppression segments protect deliverability and relationships.
- Map each segment to a distinct workflow branch. Once your segments exist, each one should map to a different message sequence, cadence, or at minimum a different subject line and CTA. If two segments receive identical content, they weren’t worth splitting.
- Validate segment size before automating. A segment with 11 contacts isn’t worth building a separate drip campaign for. As a rule, segments under 100 contacts should either be merged with a related group or handled manually. HubSpot’s automated email segmentation guide offers practical thresholds for when segmentation pays off.
For migration scenarios — when you’re moving from one platform to another and need to rebuild your segment logic — this step is where most migrations break. Segment rules don’t export cleanly between platforms. Plan at least two days to rebuild segment logic manually and validate against your historical data.
Fix 3: Connect Cross-Channel Automation So Channels Work Together
Push notifications that repeat your email. SMS messages that duplicate your drip. WhatsApp pings that arrive 10 minutes after the email you just sent. This is what cross-channel automation looks like when it’s broken — and it’s more common than most marketing teams admit.
Real cross-channel automation isn’t about being everywhere. It’s about using each channel at the moment it fits best, then handing off to the next one based on what the contact does.
The channel-role framework
Each channel has a natural job:
| Channel | Best Use Case | Worst Use Case | Automation Trigger to Use |
|---|---|---|---|
| Nurture, educational content, long-form offers | Time-sensitive alerts | Signup, segment entry, inactivity | |
| Push Notification | Flash sales, real-time triggers, re-engagement | Onboarding sequences | Cart abandonment, price drop, milestone |
| SMS / WhatsApp | Transactional, confirmations, high-urgency | Weekly newsletters | Purchase confirmation, shipping update |
| On-site Personalization | Upsell, contextual offers, returning visitors | Cold traffic (they don’t know you yet) | Return visit, loyalty tier change |
| Telegram | Community updates, software releases, digest | E-commerce promotions | New content published, event registration |
How to connect cross-channel workflows: step-by-step
- Define the primary channel for each campaign type. Email is usually the primary channel for nurture. Push is primary for urgency. Start there and layer others in — don’t start by activating all channels simultaneously.
- Build channel handoffs based on response, not schedule. If a contact doesn’t open your email within 48 hours, trigger a push notification with a shorter version of the same message. If they click the push, remove them from the email follow-up queue. The contact should feel like you’re having one conversation — not three.
- Respect channel frequency limits. Push notifications over 3 per week cause opt-out spikes. SMS over 2 per week in most markets triggers spam complaints. Email over 5 per week typically tanks open rates. Set hard caps per channel inside your automation rules.
- Unify contact data across channels. This is the technical requirement most teams skip. If your email platform doesn’t know a contact already converted via SMS, it will keep nurturing them. Your contact record needs to reflect activity from every channel before cross-channel logic can work.
- Test channel combinations with A/B splits. Before committing to a cross-channel sequence, run an A/B test: Group A gets email only. Group B gets email + push. Measure conversion rate, not just open rate. The lift from adding a channel should justify the added complexity. For workflow design patterns that prevent over-engineering, the guide on marketing workflow automation design patterns covers trigger–condition–action architecture with practical branching examples.
The Klaviyo Academy’s customer journey flows course is particularly good on this — it shows how to think about channel sequences as a journey architecture rather than a checklist of messages to send.
Step-by-Step: Full Marketing Automation Setup Checklist
Here’s what a full marketing automation setup looks like when you apply all three fixes in sequence. This is meant to be a reusable checklist — copy it into Notion, pin it to your project board, or print it and work through it section by section.
Prerequisites before you start
- Access to your email/automation platform with admin permissions
- A contact list of at least 500 subscribers with at least one behavioral data point per contact (last open, last purchase, signup source, etc.)
- Clarity on at least one core campaign goal (nurture → demo, cart abandon → recover, onboard → activate)
- UTM parameters or equivalent tracking set up on all links
Full setup checklist
- Audit your existing triggers. List every active automation and label each trigger as time-based or behavior-based. Any time-based trigger that could be replaced with a behavioral signal gets flagged for revision.
- Define your segment map. On paper (or a whiteboard), draw out every meaningful audience split. Label each one with the attribute or behavior that defines it.
- Build dynamic segments in your platform. Create segments using behavioral AND/OR logic. Validate that each segment auto-updates when contacts meet the criteria.
- Create a suppression segment. Define who should never receive this campaign. Apply suppression before any send.
- Build the core email workflow with behavioral branches. Map out trigger → condition → action for each workflow. Every branch needs an “if yes” and “if no” path.
- Add cross-channel touchpoints where they add value. For each workflow, ask: “Would a push notification here increase conversion?” If yes, add it with a channel handoff rule. If unclear, run an A/B test first.
- Set frequency caps per channel. Configure hard limits inside your platform so no contact receives more than your defined maximum per channel per week.
- Set exit criteria for every workflow. Define what action removes a contact from this sequence (purchase, cancellation, manual tag, etc.).
- Run a seed test on a small segment. Send to 10–15% of your list. Review open, click, unsubscribe, and conversion metrics after 7 days before full rollout.
- Document every workflow with a plain-language description. Future you (or your teammate) needs to understand what each automation does without reverse-engineering it.
For campaign planning templates that complement this checklist, HubSpot’s free email campaign planning template is a practical starting point for mapping sequences before you build them in your platform.
Comparing Marketing Automation Setup Approaches
| Approach | Setup Time | Best For | Main Risk | Expected Email Open Rate Lift |
|---|---|---|---|---|
| Time-based drip only | 2–4 hours | Newsletters, onboarding basics | Irrelevant timing → low engagement | Baseline (0% lift) |
| Behavior triggers, no segmentation | 4–6 hours | Small lists, single product | One message hits everyone | 10–20% lift |
| Behavior triggers + segmentation | 8–12 hours | Mid-size lists, multiple personas | Segment overlap errors | 25–40% lift |
| Full cross-channel automation | 16–24 hours | E-commerce, SaaS, multi-product | Channel fatigue if uncapped | 35–60% lift across all channels |
| Migration to new platform + all fixes | 40–80 hours | Scaling teams, consolidating stack | Data loss, segment rebuild errors | Dependent on new platform quality |
Putting It Together with an Open-Source Automation Stack
If you’re rebuilding your marketing automation setup from scratch — or consolidating a bloated stack of disconnected tools — the architecture matters as much as the fixes above.
For teams that want full control over their automation logic without vendor lock-in, CampaignOS is an open-source marketing automation platform built specifically for the kind of multi-channel workflow architecture described in this guide. It handles email, push notifications, SMS, WhatsApp, Telegram, and on-site personalization from a single visual workflow builder — which means your cross-channel handoffs (Fix 3) don’t require stitching together four separate tools.
What makes it practically useful for the fixes in this article:
- Visual workflow builder: Build your trigger → condition → action sequences with branching logic without writing code. Each branch is a visual node, which makes the workflow documentation problem (step 10 in the checklist above) mostly self-solving.
- Dynamic segmentation: Segments update in real time based on behavioral and attribute data — which directly supports Fix 2’s requirement for live audience splits.
- Lead scoring: Assign point values to contact actions and trigger workflows when thresholds are crossed. This is the behavior-trigger mechanism from Fix 1, built into the core platform.
- n8n integration: For teams that need heavy orchestration — connecting CRMs, data warehouses, or third-party APIs — n8n integration means you’re not limited to the platform’s native connectors.
- Self-hosted on Vercel with PostgreSQL: Your contact data stays on your infrastructure. For teams in regulated industries or with data residency requirements, this matters significantly.
The Omnisend Academy and HubSpot’s Automation Across the Flywheel learning path are both worth going through to understand automation architecture principles — the concepts apply regardless of which platform you ultimately use.
What Happens During Platform Migration: A Warning Worth Reading
One scenario that deserves its own attention: migrating from one email automation platform to another while trying to apply these three fixes simultaneously. This is where teams most often make expensive mistakes.
The temptation is to rebuild everything better during the migration. Fair warning — that’s a valid goal that usually takes three times longer than planned. Here’s the realistic approach:
- Migrate your contact data first, independently of your workflows. Export contacts with all behavioral and attribute data. Clean duplicates and validate segment logic before importing to the new platform.
- Rebuild your suppression lists first. This is non-negotiable. Suppression lists prevent you from emailing people who’ve opted out — and they rarely export cleanly between platforms.
- Pause all active automations in the old platform before activating them in the new one. Running parallel automations across two platforms is how contacts receive double messages and unsubscribe.
- Recreate behavioral triggers from scratch — don’t import old triggers. Time-based triggers from your old system are exactly what you’re replacing. Use the migration as the forcing function to finally build behavior-based triggers from the ground up.
The advanced setup guide on marketing automation with advanced triggers and multi-channel workflows covers the technical configuration steps in detail, including how to map old trigger logic to new behavioral equivalents during migration.
FAQ: Marketing Automation Setup Questions
How do I set up email automation for the first time?
Start by defining one goal (welcome new subscribers, recover abandoned carts, or onboard new users). Choose a trigger event that signals a contact is ready for that sequence. Build a 3–5 email workflow with behavioral branches — one path for contacts who engage, another for those who don’t. Set exit criteria before you launch. Don’t build more than two workflows until the first one is validated with real open and click data.
How do I create a drip campaign that actually converts?
A drip campaign converts when each email is sent at the right moment to the right segment with a single clear action to take. Segment your audience before writing any emails. Use behavioral triggers — not a fixed schedule — to decide when each email sends. Make sure every email has one CTA, not three. And set exit criteria so buyers don’t keep receiving “still thinking about it?” messages after converting.
What’s the difference between a drip campaign and marketing automation?
A drip campaign is a scheduled sequence of emails sent at fixed intervals regardless of contact behavior. Marketing automation responds to what contacts actually do — it branches, adjusts, and can span multiple channels based on behavioral signals. Drip campaigns are a subset of marketing automation. All drip campaigns are automated, but not all automation is a drip campaign.
How do I segment my email list for automation?
Start by identifying what changes your message: funnel stage, product interest, purchase history, engagement level, or job role. Build dynamic segments using AND/OR logic in your email platform — for example, “visited pricing page AND has not purchased AND signed up within last 30 days.” Validate each segment has at least 100 contacts before building a separate workflow for it. Add a suppression segment to exclude recent buyers and active sales conversations.
How long does it take to set up marketing automation properly?
A single behavior-triggered email workflow with segmentation takes 4–8 hours to set up correctly — including segment creation, workflow branching, copy writing, and testing. A full multi-channel automation setup across email, push, and SMS typically takes 16–24 hours of focused work. Platform migration with workflow rebuilding adds 40–80 hours depending on list size and workflow complexity. The time investment pays off: well-built automation generates revenue continuously with minimal ongoing management.
What is cross-channel automation in email marketing?
Cross-channel automation is a workflow that coordinates messages across multiple channels — email, push notifications, SMS, WhatsApp, on-site personalization — based on how a contact responds (or doesn’t respond) to each touchpoint. For example: send an email, wait 48 hours, if no open then send a push notification with a shorter version, if push is clicked then suppress the email follow-up. The key is that channels hand off to each other instead of operating independently.
How do I migrate my email automation to a new platform without losing data?
Export contact data with all behavioral attributes and segment tags before migrating. Rebuild suppression lists first — these protect you from emailing people who’ve opted out. Recreate your segment logic manually rather than importing it, since segment rules rarely transfer cleanly between platforms. Pause all automations in the old platform before activating them in the new one to avoid duplicate sends. Run a seed test on a small segment before full activation.
What are the most common marketing automation setup mistakes?
The five most common mistakes are: (1) using time-based triggers instead of behavioral ones, (2) building automation before defining segments, (3) failing to set exit criteria so buyers keep receiving nurture emails, (4) running parallel automations across channels without unified contact data, and (5) never testing with a small segment before full rollout. Each of these is fixable — and fixing them in order produces compounding improvement in campaign performance.
Keep Building Your Automation Knowledge
These three fixes give you the architecture. The next step is mastering the implementation details that make each one work in your specific stack.
Continue reading:
Marketing Workflow Automation Design Patterns That Actually Work
Advanced Triggers, Lead Scoring, and Multi-Channel Workflow Setup
How to Segment Your Audience for Email Marketing: The 2026 Playbook
Or start applying these fixes on your own infrastructure with CampaignOS — free and open-source.