Visual Workflow Builder for Marketing: How to Design Automations in 2026
Not long ago, building marketing automations required writing JSON config files or hiring a developer to wire up API calls. In 2026, a visual workflow builder for marketing makes that entire process drag, drop, and click. The canvas-based interface turns complex automation logic into something you can understand at a glance and modify in minutes — no code required, but with all the power sophisticated marketers need.
This tutorial walks through how visual workflow builders work, how to design your first automation from scratch, and how to handle branching logic, time delays, and multi-channel actions — all using a visual canvas approach.
What Is a Visual Workflow Builder?
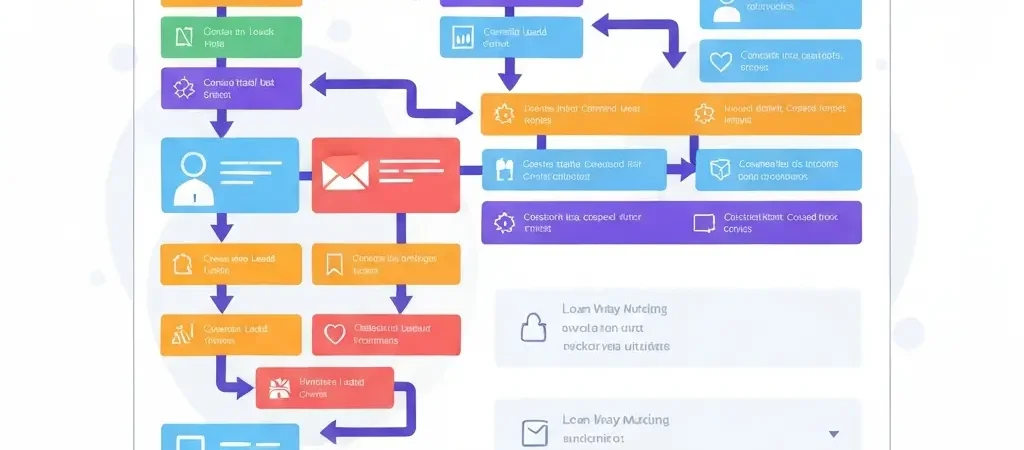
A visual workflow builder is a canvas-based editor where you construct automation logic by placing blocks — representing triggers, conditions, actions, and waits — and connecting them with directional arrows. Each block has a settings panel where you configure its behavior. The resulting diagram is both the design document and the live executable automation.
The visual approach has two key advantages over configuration-file or code-based automation:
- Readability: Anyone on your team can look at the canvas and understand exactly what the automation does and when. No more tribal knowledge locked in a single developer’s head.
- Iteration speed: Changing the logic means moving blocks and reconnecting arrows — a task that takes seconds — rather than editing nested conditions in a configuration file.
The Four Building Blocks of Every Workflow
1. Trigger blocks
A trigger block is the entry point. It starts the automation when a specific event occurs. Visual builders typically display trigger blocks in a distinct color (often green or blue) with an arrow pointing to the next block. Common triggers:
- Contact joins a segment or list
- Contact submits a specific form
- Contact visits a URL
- Contact’s tag changes
- Contact’s field value updates (e.g., plan changes to “Pro”)
- Scheduled: first of the month, contact’s anniversary, etc.
- Webhook received from external system
2. Action blocks
Action blocks are what the automation does: send email, send SMS, add tag, remove from list, update field, create CRM task, notify team member, post to Slack. Each action block connects to the next in the sequence with an arrow.
3. Condition blocks (branches)
Condition blocks split the flow into two or more paths based on whether a contact meets a condition. The visual builder shows this as a diamond or fork shape with two outgoing arrows labeled “Yes/True” and “No/False” (or whatever the paths are named). Example: “Has opened last 3 emails? → Yes: send offer / No: send re-engagement.”
4. Wait blocks
Wait blocks pause the automation for a specific duration (wait 3 days), until a specific time (wait until Tuesday 9am), or until an event occurs (wait until contact clicks). On the canvas they appear as clock or pause icons, clearly marking where time passes in the sequence.
Step-by-Step: Designing Your First Workflow
We will build a simple lead nurture sequence: 5 emails over 14 days, with a branch after Email 3 based on whether the contact clicked through.
Step 1: Open the workflow canvas
In CampaignOS, navigate to Automations → New Workflow. You will see a blank canvas with a toolbar of blocks on the left panel. Give the workflow a descriptive name (“Lead Nurture — Blog Subscribers” is better than “Workflow 1”).
Step 2: Place your trigger block
Drag a Trigger: Contact joins segment block onto the canvas. In its settings panel, select the segment “New Blog Subscribers.” This workflow will start for every contact who enters that segment.
Step 3: Add Email 1
Drag a Send Email block below the trigger. Connect the trigger’s output arrow to the email block’s input. In the settings panel, select or create your welcome email template. Enable “Send immediately” (no wait before this first email).
Step 4: Add a wait, then Email 2
Drag a Wait block below Email 1. Connect and configure: “Wait 2 days.” Then drag another Send Email block, connect it, and select your Day 2 email (“Your quick-start guide”).
Step 5: Continue the sequence through Email 3
Repeat: Wait 3 days → Send Email 3 (value-heavy content with a clear CTA link).
Step 6: Add the condition branch
After Email 3, drag a Condition block. Connect Email 3 to the condition. Configure: “Has clicked any link in Email 3?” The condition block shows two output arrows — Yes and No.
On the Yes path: add a Wait (1 day) → Send Email 4 (soft offer for engaged contacts).
On the No path: add a Wait (1 day) → Send Email 4 (different version — re-engage with a question or softer content).
Step 7: Merge the paths and add Email 5
After the two Email 4 variants, drag a Wait block (3 days) that both paths connect to, then Email 5 (direct offer/CTA for both audiences). This merges the branches back into a single path.
Step 8: Test the workflow
Use the built-in test tool to add your own email address as a contact in the trigger segment. Step through the workflow manually, verifying that each email arrives as expected and that the condition branch routes correctly based on your click/no-click behavior.
Step 9: Activate
When the test passes, click Activate. The workflow will now run automatically for every contact who joins the trigger segment.
Branching Logic: Handling Multiple Paths
Simple automations have one path. Sophisticated ones have many. Visual builders handle this through nested conditions and path merging.
Nested conditions
You can place a condition block inside another condition’s path. Example: after the “Clicked Email 3?” branch, the Yes path might have a second condition: “Is contact on a paid plan?” → Yes: show upsell / No: show upgrade offer. On a visual canvas, this nested logic is easy to follow — you can trace any contact’s path through the diagram by following the arrows.
Path merging
When two paths need to converge (both should eventually receive Email 5), use a merge node or simply connect both paths’ final blocks to the same next block. Most visual builders allow multiple incoming arrows on a single block.
Exit conditions
Always define when a contact should exit the workflow early. Common exit conditions: contact converts (makes a purchase), contact unsubscribes, contact is marked as “Customer” in CRM. Add these as exit triggers or as “remove from workflow” actions on the relevant events. Without exit conditions, converted customers will keep receiving pre-conversion emails.
Time Delays and Scheduling
Time delays are more nuanced than “wait 3 days.” Here is how to configure them effectively:
Relative delays
“Wait 3 days” counts 3 days from when the contact reached that block — regardless of what day of the week that falls on. This is fine for most workflows but means some contacts receive emails on weekends.
Scheduled delivery
“Wait until next Tuesday at 9am” always delivers on the configured day/time. Use this for audiences where weekday timing matters (most B2B audiences).
Smart send time
Some platforms, including CampaignOS, offer “send at optimal time” — an AI-driven delay that calculates each contact’s personal peak engagement window based on their historical open/click behavior. This can increase open rates by 10–20% for large lists.
Multi-Channel Workflows
Visual workflow builders in 2026 are not limited to email. You can mix channels in the same flow:
- Email → SMS sequence: Send email first. Add condition: “Did not click within 2 days?” → send SMS follow-up with the same offer.
- Email + Push notification: Trigger both channels simultaneously from a single event (e.g., flash sale announcement).
- Email + CRM task: When a lead clicks a high-intent link, simultaneously send a follow-up email and create a CRM task for a sales rep to call within 24 hours.
- Email + Slack notification: Alert your team in Slack when a high-value contact (e.g., enterprise company) joins a trial or downloads a pricing guide.
On the visual canvas, each channel action is a distinct block with its own icon. Multi-channel workflows look more complex than email-only flows, but the visual format keeps them navigable.
5 Common Marketing Workflow Templates
These templates work in any visual workflow builder and are a solid starting point for most marketing automation programs.
Template 1: Welcome series (5 emails, 14 days)
Trigger: Joins list → Email 1 (immediate, welcome + deliver promise) → Wait 2 days → Email 2 (best content) → Wait 3 days → Email 3 (social proof) → Wait 3 days → Email 4 (objection handling) → Wait 2 days → Email 5 (offer + CTA).
Template 2: Re-engagement sequence (3 emails, 14 days)
Trigger: No open or click in 90 days → Email 1 (“We miss you”) → Wait 5 days → Condition: Opened? → No: Email 2 (“Last chance”) → Wait 5 days → Condition: Opened? → No: Email 3 (“We’re removing you”) → Wait 2 days → If still no open: remove from active list.
Template 3: Trial onboarding (event-driven, 14 days)
Trigger: Trial signup → Email 1 (setup guide, immediate) → Wait 2 days → Condition: Completed setup? → No: Email 2 (setup reminder with help link) → Condition: Reached feature milestone? → No: Email 3 (feature spotlight) → Wait 7 days → Condition: Upgraded? → No: Email 4 (upgrade offer with deadline).
Template 4: Post-purchase nurture (3 emails, 30 days)
Trigger: Purchase event → Email 1 (confirmation + getting started) → Wait 7 days → Email 2 (tips for success + community invite) → Wait 14 days → Email 3 (review request + upsell).
Template 5: Abandoned cart (3 emails, 72 hours)
Trigger: Cart abandoned → Wait 1 hour → Email 1 (cart reminder, friendly) → Wait 23 hours → Condition: Purchased? → No: Email 2 (urgency, “your cart expires soon”) → Wait 24 hours → Condition: Purchased? → No: Email 3 (discount offer to complete purchase).
For more on the strategy behind these sequences, see the Marketing Automation Tutorial for Beginners and the guide on Marketing Workflow Automation Patterns and Templates.
Do It With CampaignOS
CampaignOS’s visual workflow builder is designed for both marketers and technical users. Key features:
- Drag-and-drop canvas: All trigger, condition, action, and wait blocks available from a left panel. Blocks snap to a grid and auto-connect when dragged near another block’s output.
- Block templates: Pre-built block configurations for common actions (welcome email, re-engagement, cart abandonment) that you can drop in and customize rather than build from scratch.
- Visual test mode: Click “Simulate” to step through any workflow with a test contact, watching exactly which path they take and which emails would be sent at each step.
- Version history: Every time you save a workflow, CampaignOS records the previous version. Roll back to any prior state if an edit causes unexpected behavior.
- Multi-channel blocks: Email, SMS, push notification, Slack, and webhook action blocks all available from the same canvas — no separate campaign configuration required.
Build your first visual workflow at app.campaignos.site. The workflow canvas is available on all plans, including the free tier.
Frequently Asked Questions
What is the difference between a visual workflow builder and a sequence builder?
A sequence builder is typically a linear list of steps (Email 1, wait, Email 2, wait, Email 3). A visual workflow builder is a canvas where you can create non-linear flows with branching conditions, parallel paths, and merge points. Workflow builders are more powerful and flexible; sequence builders are simpler and faster for basic use cases.
How complex can a marketing workflow get?
Modern visual builders support workflows with dozens of branches, hundreds of actions, and integrations with external systems via webhooks or APIs. In practice, the most effective workflows are often the simplest — the more complex a workflow, the harder it is to diagnose when something goes wrong. Build complexity gradually and always document what each branch is intended to do.
Can I use a visual workflow builder for non-email automations?
Yes. Modern platforms including CampaignOS support SMS, push notifications, Slack messages, CRM task creation, and webhook calls — all configurable from the same visual canvas. You can mix channels in a single workflow, such as sending an email first and following up with an SMS if the email is not clicked within 48 hours.
How do I prevent contacts from entering the same workflow twice?
Most visual workflow builders have a “re-entry” setting on the trigger block. Set it to “Allow only once” to prevent a contact from re-entering a workflow they have already completed or are currently in. For evergreen workflows like a welcome series, you typically want each contact to go through only once — for promotional workflows you might want re-entry allowed after a cooldown period.
What happens to contacts already in a workflow if I edit it?
It depends on the platform. Most allow you to pause a workflow, make changes, and then republish — contacts who are mid-flow will continue from their current position in the updated workflow. Some platforms queue all changes and apply them when contacts reach the next step. Always check your platform’s behavior and test with a dummy contact after editing a live workflow.
Do I need coding skills to use a visual workflow builder?
No. The visual interface is designed for marketers without technical backgrounds. Basic marketing logic (if/then, wait, send) maps directly to the blocks available on the canvas. If you want to add custom webhooks or API calls — for example, to update records in an external CRM — a small amount of technical knowledge helps, but most use cases require no code at all.