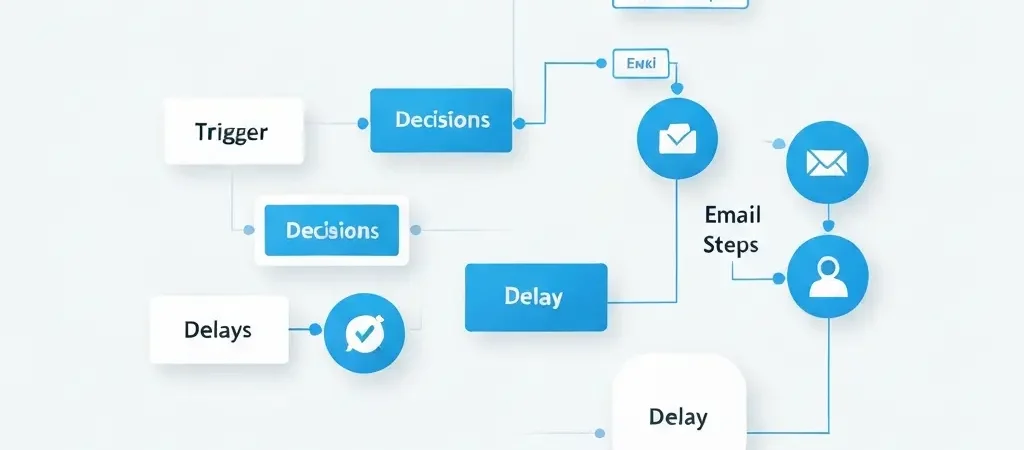
How to Build a Marketing Workflow With Automation (2026 Practical Guide)
Knowing how to build a marketing workflow with automation is one of the highest-leverage skills a marketer can have in 2026. The average marketing team now manages eight or more channels simultaneously — email, SMS, push, social, paid, in-app — and doing that manually at scale is impossible. Automated workflows let you design the conversation once, trigger it from real behaviour, and let the system run while your team focuses on strategy. This guide walks you through ten concrete steps, from mapping your customer journey to measuring live performance.
According to Salesforce’s 2025 State of Marketing report, 78% of high-performing marketing teams use workflow automation across three or more channels. Teams that automate lead nurturing generate 50% more sales-ready leads at 33% lower cost. The gap between teams that automate and those that don’t is widening — and 2026 is the year that gap becomes permanent.
Prerequisites, Time, and Difficulty
| Item | Detail |
|---|---|
| Difficulty | Beginner–Intermediate. No coding required with a visual builder. |
| Time | 2–4 hours (simple); 1–3 days (multi-branch with integrations) |
| You need | A marketing automation platform, a contact list or lead source, at least one goal (conversion event), and defined audience segments |
| Nice to have | CRM integration, behavioural tracking pixel, existing email templates |
You do not need a developer. Platforms like CampaignOS provide a drag-and-drop visual workflow builder where every step is a node you connect on a canvas. If you can draw a flowchart, you can build an automated workflow.
Step 1: Map the Customer Journey
Before touching any software, draw the journey your customer takes from first awareness to conversion — on paper or in a whiteboard tool. Identify the stages: Aware, Interested, Considering, Decided, Retained. For each stage, list the actions a contact might take (visited pricing page, downloaded a guide, abandoned cart) and what your ideal next touchpoint should be.
A journey map is the skeleton of your workflow. Every automated sequence is just a subset of that map — one branch covering contacts moving from stage A to stage B. If you skip this step you will build workflows that feel disconnected from each other because they were designed without a unified view of the full experience.
Step 2: Identify Trigger Events
A trigger is the specific action or condition that starts the workflow for a given contact. Choosing the right trigger is the most important decision in the entire build — a poorly chosen trigger means the right message goes to the wrong person at the wrong time.
Common trigger types in 2026:
- Form submission — contact fills in a sign-up, demo request, or content download form
- Page visit — contact visits a specific URL (pricing, features, careers)
- Email engagement — contact clicks a specific link or opens a specific campaign
- Purchase or plan change — contact upgrades, downgrades, or buys for the first time
- Inactivity — contact has not opened any email in 60 days
- Date-based — renewal date, trial expiry, anniversary
- Webhook or API event — external system signals an event (e.g., Stripe payment succeeded)
In CampaignOS, you select a trigger from a dropdown at the start of every workflow node. Webhook triggers connect directly to your product or CRM via a POST endpoint, making real-time automation possible without third-party connectors.
For deeper context on how webhooks fit into automation architecture, see Webhook Marketing Automation: Developer’s Complete Guide 2026.
Step 3: Define Entry and Exit Criteria
Entry criteria determine which contacts are eligible to enter the workflow. Exit criteria determine when they leave — either by completing the goal, hitting a disqualifying condition, or timing out.
Entry criteria examples:
- Contact has tag “trial-user” AND signed up within the last 7 days
- Contact is in segment “enterprise” AND has not booked a demo
- Contact opened last campaign AND clicked the pricing link
Exit criteria examples:
- Contact converts (books demo, upgrades plan, makes purchase)
- Contact unsubscribes from any email
- Contact’s lead score drops below threshold
- 30 days pass with no conversion
Also decide on re-entry rules: can a contact enter the same workflow twice? For onboarding workflows, never. For re-engagement workflows, yes — but with a minimum gap (e.g., no re-entry within 90 days). Setting re-entry rules prevents duplicate sequences and keeps your sending reputation intact.
Step 4: Design Branches
A branch is a conditional fork in the workflow — “if the contact does X, send message A; if they do Y, send message B.” Branches are what separate automated workflows from simple drip sequences. They make the experience feel personal because the contact’s behaviour shapes what they receive next.
In CampaignOS’s visual builder, you add a Decision node to any point in the canvas and configure the condition using a point-and-click rule builder. Drag paths out of the Decision node for each outcome — typically a “Yes” path and a “No” path, though you can add multiple branches for multi-value conditions.
Start with two to three branches per workflow. Each branch you add doubles the QA surface area. Design for the 80% case first — the 20% edge cases can be addressed in iteration two.
Step 5: Add Delays
Delays control the timing between steps. Sending three emails in one hour destroys deliverability and annoys contacts. Spacing them correctly improves open rates and gives contacts time to act before you send the next message.
General delay guidelines for 2026:
- Welcome sequences: Day 0 immediately, Day 1, Day 3, Day 7
- Lead nurture (cold): Every 3–5 days
- Trial onboarding: Day 1, Day 3, Day 7, Day 12, Day 21
- Re-engagement: Day 0, Day 5, Day 10 — then exit if no response
- Cart abandonment: 1 hour, 24 hours, 72 hours
Use smart send-time optimisation where your platform supports it. CampaignOS calculates each contact’s historically best open window and adjusts message delivery accordingly, rather than sending everyone the same fixed delay. This alone lifts open rates by 10–15% on average.
Step 6: Configure Filters
Filters are rules applied to contacts already inside the workflow — they suppress messages for contacts who don’t meet a condition at the exact moment a step fires. Filters differ from entry criteria: entry criteria gate the workflow entrance; filters gate individual steps within it.
Examples of step-level filters:
- Only send “upgrade” email if contact is still on the free plan at send time
- Skip SMS step if contact has opted out of SMS
- Skip “book a demo” email if contact already has a demo scheduled
- Only send in contact’s local business hours (9am–6pm)
Filters prevent embarrassing sends — the upgrade email going to someone who already upgraded, or the reactivation campaign reaching someone who converted three days ago. Treat every step as if the contact’s status might have changed since they entered, because it often has.
Step 7: A/B Test Your Messages
Before scaling to your full audience, A/B test the highest-impact steps. For most workflows, the first message is the one worth testing — it sets the tone for the entire sequence and determines whether contacts continue or drop off.
What to test:
- Subject line — the single highest-impact variable for open rate
- CTA copy and placement — “Get started free” vs. “Try it now” vs. “See how it works”
- Message length — short and direct vs. detailed and educational
- Send time — morning vs. afternoon delivery
- Personalisation depth — first name only vs. company + role + use-case
Run each test on a statistically significant sample — a minimum of 200 contacts per variant for open rate, 500+ for click rate. Let tests run for at least 48 hours before declaring a winner. In CampaignOS, A/B split nodes route percentages of traffic to variant paths automatically and surface winner data in the workflow analytics panel.
For additional patterns see Marketing Workflow Automation Best Practices: Patterns That Scale in 2026.
Step 8: QA Every Path
QA is the step most teams skip and then regret. Before going live, walk through every path in the workflow manually using test contacts. Verify that:
- Every branch fires correctly under the conditions you set
- Delays fire at the right intervals
- Filters suppress the right contacts
- Personalisation tokens render correctly (and have fallback values for empty fields)
- Links in every message are correct and tracked
- Unsubscribe links work and remove contacts from the workflow immediately
- Goal conversions trigger exit from the workflow as expected
Send test emails to a seed list covering at least three email clients (Gmail, Outlook, Apple Mail). Render-test on mobile — over 60% of emails in 2026 are opened on mobile devices. Fix any broken layouts before launch.
Step 9: Launch
Do not launch to your full list on day one. Start with a controlled rollout:
- Seed launch (Day 1): 50–100 internal or trusted contacts. Confirm delivery, rendering, and link tracking.
- Soft launch (Day 3–5): 5–10% of eligible audience. Monitor open rates, click rates, unsubscribes, and spam complaints for 48 hours.
- Full launch: If metrics are within acceptable ranges (spam complaint rate below 0.08%, unsubscribe rate below 0.5%), open to 100% of the audience.
Set up real-time alerts for spam complaints and hard bounces. A spike in either metric within the first 24 hours of launch is a signal to pause, diagnose, and fix before continuing. Most issues at launch are either a deliverability problem (list quality) or a messaging problem (wrong offer to the wrong segment).
For a complete setup walkthrough, see How to Set Up Marketing Automation From Scratch.
Step 10: Measure and Optimise
A workflow is not done when it launches — it is done when it stops improving. Track these metrics for every active workflow:
| Metric | Benchmark (2026) | What a drop signals |
|---|---|---|
| Open rate | 35–50% (automated) | Subject line or send-time issue |
| Click-through rate | 4–8% | Weak CTA or misaligned offer |
| Step completion rate | >70% per step | Drop-off point to investigate |
| Workflow conversion rate | Varies by goal | Funnel or offer mismatch |
| Unsubscribe rate | <0.5% | Frequency or relevance problem |
Review workflow performance every 30 days for the first three months, then quarterly once it is stable. Use the step completion rate to identify the single weakest link — the step where the most contacts drop off — and fix that first. Small improvements to the weakest step compound across every contact who enters after the fix.
For more on building automated email sequences, see How to Create an Email Drip Campaign.
Frequently Asked Questions
How long does it take to build a marketing workflow with automation?
A simple single-branch workflow — like a welcome sequence — takes 2–4 hours to build and test. A multi-branch workflow with conditional logic, A/B tests, and CRM integration typically takes 1–3 days depending on team size and data readiness.
What triggers can I use in a marketing automation workflow?
Common triggers include form submissions, page visits, email clicks, purchase events, inactivity windows, date-based conditions, and API or webhook events from external tools. Most platforms including CampaignOS support all of these natively.
What is the difference between a workflow and a campaign in marketing automation?
A campaign is a one-time or recurring broadcast to a defined audience. A workflow is an evergreen, behaviour-triggered sequence that runs automatically whenever a contact meets entry criteria — independently of any broadcast schedule.
How do I avoid sending duplicate messages in an automated workflow?
Set re-entry rules to prevent contacts from entering the same workflow twice within a defined window. Use global unsubscribe lists and frequency caps. CampaignOS enforces re-entry controls at the workflow level so duplicates are blocked by default.
Do I need coding skills to build a marketing automation workflow?
No. Platforms like CampaignOS provide a drag-and-drop visual builder that requires zero coding. For advanced use cases — custom webhooks, API integrations, or dynamic personalisation — basic familiarity with JSON helps but is not required.
How many steps should a marketing automation workflow have?
There is no fixed rule. Welcome sequences typically have 3–5 steps. Lead nurture workflows range from 5–10 steps spread over 2–4 weeks. Re-engagement workflows are usually short — 2–3 messages over 7 days. Start lean and add steps based on performance data.
What metrics should I track for an automated marketing workflow?
Track open rate, click-through rate, conversion rate, step completion rate, exit rate per step, and revenue attributed. For lead nurture workflows, also track MQL-to-SQL conversion rate and time-to-conversion.
Ready to Build Your First Automated Workflow?
CampaignOS gives you a visual drag-and-drop workflow builder, built-in A/B testing, smart send-time optimisation, and real-time analytics — all in one open-source platform with no per-contact pricing. Design, test, and launch your first automated marketing workflow in under a day.