How to Set Up Push Notifications for Your Website in 2026: Step-by-Step Guide
Push notifications are the most immediate channel in any marketing automation stack — they arrive on a user’s device the moment they are sent, with no inbox to compete with and no spam filter to bypass. If you want to set up push notifications for your website, you need to configure three things correctly: the technical implementation, the opt-in prompt, and the automation triggers that determine when and why notifications fire. This guide covers all three, step by step, in plain language.
How Web Push Notifications Work
Web push notifications use the browser’s Push API and a service worker — a background script registered in the user’s browser — to deliver messages even when the user is not actively browsing your website. The delivery path has three stages:
- A user visits your site and sees an opt-in prompt.
- They click “Allow” — the browser registers a unique subscription with your push provider and stores it on a push server.
- When you send a notification, your push service delivers it to the push server, which routes it to the subscriber’s browser via the operating system’s native notification system.
This means notifications work on desktop (Windows, macOS, Linux) and Android via Chrome, Firefox, and Edge. iOS Safari added web push support in Safari 16.4, making iPhone subscribers accessible via web push for the first time in 2023.
Prerequisites: Your website must be served over HTTPS. Push notifications require a secure origin. If your site still runs on HTTP, upgrade to HTTPS before proceeding.
Time estimate: 2–4 hours for full setup.
Difficulty: Beginner to intermediate. Most steps are copy-paste with no coding required.
Step 1: Choose a Push Notification Service
A push notification service manages subscriber registrations, notification delivery, and analytics. It abstracts the complexity of the Push API so you don’t need to build server infrastructure. Evaluate services on these criteria:
- Browser compatibility: Confirm support for Chrome, Firefox, Edge, and Safari (including Safari on iOS for iPhone subscribers).
- Automation and triggers: Can you trigger notifications automatically based on contact behavior — abandoned cart, new blog post, price drop — without manual sends?
- Segmentation: Can you segment push subscribers by behavior, geography, device type, or custom properties?
- Marketing platform integration: Does it integrate with your email marketing platform so you can coordinate push and email in the same workflow? Platforms like CampaignOS include web push natively alongside email and SMS, eliminating the need for a separate vendor.
- Pricing: Most services offer a free tier covering 500–10,000 subscribers. Confirm the pricing structure before you scale.
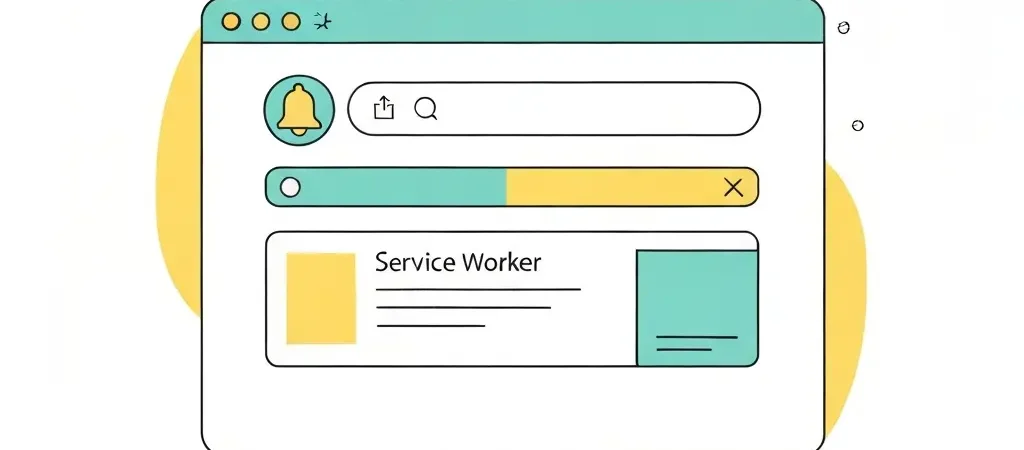
Step 2: Install the Service Worker Script
Time estimate: 15–30 minutes.
Every push notification service provides a service worker file and a JavaScript snippet. Here is the standard installation process:
- Download the service worker file from your provider. It is typically named
service-worker.jsorsw.js. This file must be placed at the root of your domain (e.g.,https://yourdomain.com/service-worker.js), not in a subdirectory — the service worker’s scope is limited to the directory it is placed in. - Upload the service worker file to your site root. Use FTP, your CMS file manager, or your host’s dashboard. If you are using a website builder (WordPress, Squarespace, Shopify), your provider may offer a plugin or app that does this automatically.
- Add the initialization snippet to your site’s
<head>tag. This JavaScript snippet is provided by your push service. It registers the service worker and initializes the push subscription flow. Copy-paste it exactly as provided. - Verify the installation. Open your browser’s developer tools, go to the Application tab, and look for the service worker in the Service Workers panel. It should show as “Activated and running.”
Step 3: Configure the Opt-In Prompt
Time estimate: 30–60 minutes for setup and testing.
The opt-in prompt is the modal or bar that asks visitors to allow push notifications. Opt-in rate is the single most important variable in your push notification program — without subscribers, there is nothing to send to.
Web push opt-in rates average 5–15% when prompts are well-placed. Poorly placed prompts that fire immediately on page load average 1–3%. Apply these rules:
- Do not fire the opt-in prompt on the first page view. A visitor who just arrived has not yet established any reason to trust your notifications. The best time to prompt is after a user has read a full article, reached the checkout stage, or viewed a product for more than 30 seconds.
- Use a two-step opt-in flow. Show your own branded dialog asking “Would you like notifications about X?” first. Only show the native browser permission dialog when they click “Yes.” This filters out disinterested visitors and ensures the contacts who reach the browser prompt are predisposed to click “Allow.”
- State the value explicitly. “Get notified when new tutorials are published” converts better than “Allow notifications.” Tell subscribers exactly what they will receive.
- Place prompts on your highest-value pages. Pricing pages, product pages, checkout pages, and popular blog articles convert at 2–4x the rate of homepage or about page prompts.
- Set a re-prompt delay. If a visitor dismisses the prompt without opting in, wait at least 14 days before showing it again. Over-prompting is the fastest way to generate negative brand impressions.
Step 4: Segment Your Push Subscribers
Push subscriber lists should never be treated as one undifferentiated group. Segment subscribers from the moment they opt in:
- Capture the source page. Know which page a subscriber opted in from. A subscriber who opted in on a product category page has implied an interest in that category. Use this to personalize the first notification they receive.
- Tag by device and browser. Segment mobile subscribers separately from desktop subscribers. Mobile push notifications perform differently — shorter text, stronger visuals, and immediate time-sensitive content convert better on mobile.
- Apply behavioral tags. As subscribers visit pages, click notifications, and take actions on your site, apply tags that reflect their interests. A subscriber who has clicked three notifications about discounts belongs in a “price-sensitive” segment.
- Sync with your email segments. If your marketing automation platform supports it, match push subscribers to contact records in your CRM. This lets you send coordinated sequences — email on day 1, push notification on day 3, SMS on day 5 — to the same contact with no manual matching. For full workflow setup, see how to set up marketing automation from scratch.
Step 5: Define Your Notification Types
Before automating, define which types of notifications you will send. Over-notifying is the primary reason subscribers opt out. In 2026, the average push notification opt-out rate spikes within the first 30 days for brands that send more than one notification per day.
The four high-performing notification categories are:
- Transactional notifications: Order confirmed, shipment dispatched, password reset, appointment reminder. These have the highest open rates (40–60%) because they are personally relevant and expected. Always enable these first.
- Triggered behavioral notifications: Abandoned cart, price drop on a viewed item, back-in-stock alert. These are automated, behavior-specific, and arrive at the moment of peak intent. Cart abandonment push notifications recover 5–10% of abandoned carts when sent within 1 hour of abandonment.
- Content notifications: New article published, new video available, webinar registration reminder. These work well for publishers, SaaS companies with active blogs, and any brand where content consumption is part of the customer journey.
- Promotional notifications: Limited-time offer, flash sale, member-exclusive discount. Use sparingly — no more than 2–3 per month. These have the highest opt-out risk of any notification type. Limit them to subscribers who have explicitly opted into promotional alerts via a preference center.
Step 6: Build Automated Push Triggers
Time estimate: 1–2 hours per automated trigger.
- Connect your push service to your data sources. To trigger behavioral notifications, your push service needs to receive events from your website (page views, cart additions, purchases). This is done via API calls or by using a platform that handles both tracking and push natively.
- Set up your first triggered notification. Start with cart abandonment if you run e-commerce, or “welcome push” if you run content or SaaS. A welcome push sent 5 minutes after opt-in achieves a 50–60% click-through rate on average, reinforcing the opt-in decision and setting engagement expectations.
- Build the cart abandonment trigger. Trigger: “item added to cart” AND “no purchase completed” within 1 hour. Send the first notification at 1 hour post-abandonment, the second at 24 hours. Include the product name, a product image, and a direct link to the cart page.
- Set a global send frequency cap. In your push platform settings, enable a cap that prevents any single subscriber from receiving more than 1 notification per day and no more than 5 per week from all automated sources combined.
- Integrate with your email workflow. Coordinate push and email sends so they complement rather than compete. If email 2 of your drip sequence goes out on Day 3, send the push notification on Day 4. See how to create an email drip campaign step by step for timing guidance that applies across channels.
Step 7: Write High-Converting Push Notifications
Push notifications have strict size limits. Across most browsers and operating systems in 2026:
- Title: 40–50 characters max (truncated beyond this on most devices)
- Body text: 100–120 characters max on desktop, 40–60 on mobile
- Action buttons: 20 characters per button
- Lead with the most important word. Titles like “Sale: 40% off today only” outperform “We have a special offer for you.” Get to the point in the first three words.
- Include a specific number or fact. “3 new tutorials published” outperforms “New content available.” Specificity signals relevance.
- Use urgency only when it is genuine. “Offer ends in 4 hours” only works if the offer actually ends in 4 hours. False urgency destroys trust and increases opt-outs.
- Add a notification icon. Notifications with a recognizable brand icon (your logo) receive 25–40% more clicks than iconless notifications. Use a square image at 192×192 pixels.
- Test two versions of every campaign. A/B test push notification titles the same way you test email subject lines. Most push providers support 50/50 split testing — use it.
Step 8: Test Across Browsers and Devices
- Test on Chrome (desktop and Android) — the most common push notification browser globally.
- Test on Firefox (desktop) — different rendering than Chrome.
- Test on Safari (macOS and iOS) — Apple uses different permission prompts and notification display behavior than Chromium-based browsers.
- Test on Edge (Windows) — verify rendering on Windows 10 and Windows 11 notification centers.
- Test opt-out flow. Subscribe, then unsubscribe using the browser’s native notification settings. Confirm your platform records the opt-out and stops sending to that subscription.
2026 Push Notification Benchmarks
| Notification Type | Average Click Rate | Opt-In Rate |
|---|---|---|
| Transactional | 40–60% | N/A |
| Welcome push | 50–60% | N/A |
| Cart abandonment | 15–25% | N/A |
| Promotional (well-segmented) | 4–8% | N/A |
| Web push opt-in (all sites) | N/A | 5–15% |
For multi-channel automation that includes push, email, and SMS in the same workflow, see how to automate customer engagement across channels. For platform comparison including push support, see the best open source marketing automation tools ranked in 2026.
Add Push Notifications to Your Automation Stack
CampaignOS includes web push notifications natively alongside email and SMS — one platform, one workflow builder, zero vendor coordination. Free to start.
Frequently Asked Questions
Do push notifications work on iPhones?
Yes, as of Safari 16.4 (released in 2023), web push notifications work on iPhones and iPads via Safari. However, the website must be added to the user’s home screen as a Progressive Web App (PWA) before push permission can be granted. This creates an additional step that reduces iOS opt-in rates compared to Android. Native app push notifications on iOS via APNs do not require the home screen installation step.
What is the average push notification opt-in rate?
Web push opt-in rates average 5–15% for sites with well-placed, delayed prompts using a two-step opt-in flow. Sites that fire the browser permission dialog immediately on page load see rates of 1–3%. The financial services industry sees opt-in rates up to 10%, while media and content sites average 6–8%. Mobile app push opt-in rates are significantly higher: 51% on iOS and 81% on Android.
How many push notifications should I send per week?
A maximum of 3–5 push notifications per week per subscriber is the safe upper limit for most industries. Media and news sites can push daily without high opt-out rates because the value is clear and expected. For e-commerce and SaaS, limit promotional notifications to 2–3 per month. Always prioritize triggered, behavioral notifications over broadcast promotional sends.
Can I send push notifications without a third-party service?
Yes, but it requires significant backend development. You would need to implement the Web Push Protocol yourself, manage subscriber registrations in a database, and handle push server communication with each browser vendor (Google’s FCM, Mozilla’s Autopush, Apple’s APNs). For most teams, a third-party service or an all-in-one marketing automation platform that includes push is far more efficient than building this infrastructure from scratch.
What happens when a push subscriber clears their browser data?
Clearing browser data, including cookies and site data, also removes the service worker registration and push subscription. The subscriber effectively unsubscribes from push without actively opting out. This results in “silent churn” in your push subscriber list. Most push platforms mark these as undeliverable after a few failed delivery attempts and stop counting them as active subscribers. There is no way to recover these subscriptions — the user must opt in again.
How do push notifications compare to email marketing?
Push notifications have higher immediacy but lower information density than email. Push notifications arrive and are seen within minutes; emails may sit unread for hours or days. However, emails can convey far more context, include rich content, and drive longer decision-making journeys. The two channels are complementary — use push for time-sensitive, high-intent moments and email for relationship-building and complex messaging.