How to Track Campaign Performance with Marketing Automation in 2026
Most marketers have dashboards. Very few have dashboards that tell them what to do next. Knowing how to track campaign performance with marketing automation is not about collecting more data — it is about connecting the right metrics to the right decisions, automatically, so that every campaign improvement is grounded in evidence rather than guesswork.
This guide covers everything from defining your KPIs and configuring tracking events, to building real-time dashboards, setting up attribution, and creating a systematic optimization cycle. Every step is directly executable inside a modern marketing automation platform.
Prerequisites
- A marketing automation platform with built-in analytics or API access (e.g., CampaignOS)
- A CRM or ecommerce platform that records customer transactions
- Google Analytics 4 (or equivalent) installed on your website
- Admin access to your ad platforms (Google Ads, Meta Ads, LinkedIn Ads)
- Estimated setup time: 4-6 hours for full configuration; 30 minutes per week to maintain
- Difficulty: Intermediate. No coding required if using a unified platform.
Step 1 — Define KPIs for Each Campaign Type
Generic metrics produce generic insights. Before you configure a single tracking event, assign specific KPIs to each campaign type you run. This ensures your reporting answers actual business questions.
- Email campaigns: Open rate, click-to-open rate (CTOR), unsubscribe rate, conversion rate (clicks that lead to a defined goal), and revenue per email sent.
- Lead nurturing sequences: Sequence completion rate, lead-to-MQL conversion rate, time-to-conversion, and drop-off rate per email step.
- Re-engagement campaigns: Re-activation rate (previously inactive contacts who open or click), list shrinkage rate (how many unsubscribe), and cost-per-reactivation.
- Product launch campaigns: Revenue generated within 7 days of launch, new customers acquired (not just purchasers — new contacts who converted), and refund rate.
- Paid acquisition campaigns: Cost per lead (CPL), lead-to-close rate, customer acquisition cost (CAC), and return on ad spend (ROAS).
Document these KPIs in a shared spreadsheet or wiki before proceeding. When everyone on the team agrees on what success looks like for each campaign type, reporting conversations become faster and less subjective.
| Campaign Type | Primary KPI | Secondary KPI | 2026 Benchmark |
|---|---|---|---|
| Email newsletter | Open rate | CTOR | 28% open / 10% CTOR |
| Welcome sequence | Conversion rate | Sequence completion % | 3-5% conversion |
| Paid lead gen | CAC | Lead-to-close rate | LTV:CAC > 3:1 |
| Re-engagement | Re-activation rate | Unsubscribe rate | 15-20% reactivation |
Step 2 — Instrument Your Conversion Events
- Define your conversion hierarchy: Identify your macro-conversion (the event that directly generates revenue: purchase, trial signup, demo booked) and your micro-conversions (events that lead toward the macro: email click, landing page visit, form submission).
- Add tracking to every conversion point: For each micro and macro conversion, place a tracking event — either a native integration (your automation platform’s form tracker), a JavaScript event (GA4 custom event), or a server-side webhook. Missing even one event creates attribution gaps.
- Use UTM parameters consistently: Every link in every email, ad, or social post should carry UTM parameters:
utm_source,utm_medium,utm_campaign, andutm_content. Without UTMs, traffic from your emails appears as “direct” in GA4, making your email contribution invisible. - Test every event before going live: Use your platform’s event debugger or GA4’s DebugView to confirm that each tracking event fires correctly and sends the right data. A misconfigured event discovered after a month of campaigns means a month of unusable data.
- Document your event taxonomy: Write down the name, trigger condition, and expected data payload for every event you track. This documentation prevents team members from creating duplicate or conflicting events.
Step 3 — Connect Your Tech Stack
- Connect your CRM: Your automation platform and CRM should share contact data bidirectionally. When a lead in your automation platform becomes an opportunity in your CRM, that status change should flow back automatically so your campaign reports can show revenue influenced, not just clicks generated.
- Connect your ad platforms: Link Google Ads, Meta Ads, and LinkedIn Ads to your automation platform or analytics tool. This enables you to see the full journey from ad click to email subscriber to paying customer in one report.
- Connect your ecommerce or billing system: Revenue data from Stripe, Shopify, or your billing platform should flow into your reporting so you can calculate revenue per subscriber, revenue per campaign, and actual ROAS.
- Enable conversion sync back to ad platforms: Send your CRM-verified conversions (not just pixel-fires) back to Google and Meta as offline conversions. This gives the ad platforms’ algorithms better training data and typically improves ROAS by 15-25% according to 2026 Google Ads performance data.
See the full guide on how to build a marketing workflow with automation for how to structure the integrations that feed this tracking system.
Step 4 — Configure Your Attribution Model
- Choose a model that matches your sales cycle: For short sales cycles (under 3 days), last-touch attribution is fine. For longer cycles with multiple touchpoints, use a linear, position-based, or data-driven model. Using last-touch for a 30-day B2B sales cycle systematically undercredits early-funnel content like email nurture sequences.
- Set a lookback window: Define how far back you attribute a conversion to a campaign touch. 30 days is standard for email; 7 days for paid social. Longer windows credit more touchpoints but can inflate campaign performance numbers.
- Document which model you use and why: When you change attribution models, historical performance data becomes incomparable. Pick a model, stick with it, and document the rationale. Change it only when your sales cycle fundamentally changes.
- Use multi-touch reporting for strategy, last-touch for operations: Multi-touch attribution is valuable for understanding which channels contribute to the pipeline. Last-touch is easier to act on day-to-day because it clearly assigns each conversion to a specific campaign.
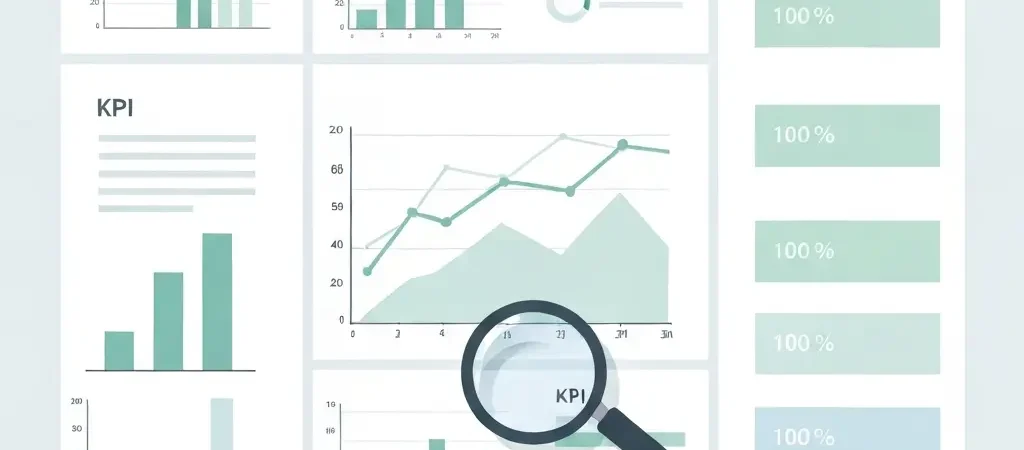
Step 5 — Build Role-Specific Dashboards
One dashboard for everyone serves no one well. Build two: an operational dashboard for daily campaign management, and a strategic dashboard for weekly or monthly business reviews.
- Operational dashboard (refresh every 15-60 minutes): Include current-day email sends, open rate, click rate, unsubscribes, bounce rate, active automation contacts, and campaign-level conversion counts. This is the dashboard a campaign manager checks at 9 AM to ensure everything is running normally.
- Strategic dashboard (weekly view): Include revenue attributed to email vs. paid vs. organic, CAC trend by channel, LTV:CAC ratio, MQL-to-close conversion rate, and list growth rate. This is the dashboard used in marketing leadership meetings.
- Set up your dashboards in your automation platform’s native analytics: Native dashboards pull data automatically from the campaigns you are running in that platform. Avoid manually exporting CSVs — any report that requires manual data entry will not be maintained consistently.
- Add a “health indicators” section: Three to five metrics with green/yellow/red thresholds that tell anyone looking at the dashboard whether email performance is healthy at a glance. Example: open rate above 25% = green, 18-25% = yellow, below 18% = red.
Step 6 — Set Up Automated Alerts
- Alert on anomaly, not on schedule: Scheduled reports are for reviews. Alerts are for problems that need immediate attention. Configure alerts to fire when a metric moves outside its normal range — not just when it crosses an arbitrary threshold.
- Critical alerts (immediate notification): Email bounce rate above 5%, spam complaint rate above 0.1%, an automation workflow that stops processing (0 contacts progressing when contacts should be active), or a conversion rate that drops more than 50% versus the previous 7-day average.
- Warning alerts (daily digest): Open rate declining more than 15% week-over-week, list growth rate negative for 3 consecutive days, or a campaign nearing its budget cap.
- Route alerts to the right people: Deliverability alerts go to the email administrator. Revenue alerts go to the marketing manager. Workflow errors go to the automation operator. A single email blast to the entire team creates alert fatigue and ensures nobody acts.
Step 7 — Automate Your Reporting Cadence
- Daily automated report: A one-page summary of yesterday’s campaign performance emailed to the campaign team at 8 AM. Include sends, opens, clicks, conversions, and any anomalies flagged by your alert system. This should require zero manual work — configure it once in your platform and let it run.
- Weekly report: Sent to marketing leadership on Monday morning, covering the previous week’s performance versus targets, top-performing and lowest-performing campaigns, and one recommended action item based on the data.
- Monthly deep-dive: A 30-minute review meeting (with a pre-prepared report) covering revenue attribution, list health, A/B test results, and the upcoming month’s optimization priorities. This is the meeting where you decide what to change.
- Archive all reports: Store monthly reports in a shared folder. Six months of data lets you spot seasonal patterns that would be invisible in a single month’s view. You will need this context when planning campaigns for the same period next year.
Step 8 — Run a Monthly Optimization Cycle
- Identify the single lowest-performing metric: Look at your KPI dashboard and find the metric that is furthest below its benchmark. This is your optimization target for the month.
- Form a specific hypothesis: “Our email open rate is 19% against a 28% benchmark. We believe this is caused by subject lines that do not create curiosity. Testing curiosity-gap subject lines should increase open rate to 24%.”
- Design one test: Change only the element that your hypothesis identifies. If you are testing subject lines, change nothing else in the email. Run the test for at least 2 weeks or until you have statistical significance (typically 300+ opens per variant).
- Implement the winner and document the result: Apply the winning variant to all future campaigns of that type. Document the before/after metric change in your optimization log. This log is your institutional memory — it prevents your team from re-running tests you have already run.
- Repeat with the next lowest metric: One improvement per month, applied consistently, compounds into significant performance gains over a year. For a framework that ties this optimization cycle into your full workflow, see how to set up A/B testing for email campaigns step by step.
Step 9 — Advanced Tracking: Revenue Attribution and LTV
Once your basic tracking is running cleanly, these two advanced metrics unlock higher-order decisions about where to invest your marketing budget.
- Revenue per subscriber (RPS): Total revenue generated from email ÷ total subscribers. This is the clearest signal of list quality. If your RPS is $2.50/subscriber/month, you can calculate exactly how much a new subscriber is worth and how much you should spend to acquire one.
- Customer lifetime value (LTV) by acquisition channel: Segment your customer data by the channel that brought each customer in. If subscribers who came through organic content have a 3x higher LTV than those from paid ads, that insight should shift your budget allocation — even if paid ads produce more initial volume.
- Cohort analysis: Group subscribers by the month they joined and track their conversion and retention rates over time. This reveals whether newer subscriber cohorts perform better or worse than older ones, which tells you whether your lead quality is improving or declining.
- Feed LTV data back into your automation: Tag high-LTV customers and use those tags to trigger retention-focused automations (exclusive offers, early feature access, loyalty programs). The best customers deserve a different — and better — automation experience than new leads.
Understanding whether marketing automation is worth it for your business becomes much clearer once you have this revenue attribution data in place.
Frequently Asked Questions
What are the most important metrics to track in email marketing automation?
The five metrics that matter most are: open rate (list engagement health), click-to-open rate (content relevance), conversion rate (campaign effectiveness), unsubscribe rate (audience fit), and revenue per email sent (overall ROI). Track these per campaign type, not just as site-wide averages. A welcome sequence should have different benchmarks than a re-engagement campaign or a product launch email.
How do I track ROI from email marketing campaigns?
Connect your email platform to your CRM or ecommerce platform so that revenue from converted email contacts flows back into your campaign reports. Use UTM parameters on every email link so that Google Analytics can attribute website purchases to their originating email campaign. Calculate ROI as: (revenue attributed to email – cost of email marketing) ÷ cost of email marketing × 100. The 2026 industry benchmark for email ROI is $36-44 for every $1 spent.
What is a good open rate for automated email campaigns in 2026?
In 2026, automated campaigns (triggered by behavior) consistently outperform batch newsletters. Triggered automation emails average 35-50% open rates, compared to 22-28% for scheduled newsletters. Welcome emails specifically average 50-60% open rates. If your automated campaigns are performing below 25%, audit your subject lines, sender name, and list hygiene — those three elements account for the majority of open rate variance.
How often should I review campaign performance data?
Check your operational dashboard daily (5 minutes) to confirm campaigns are running and no anomalies have appeared. Review performance trends weekly (30 minutes) to identify patterns and compare against previous weeks. Conduct a full optimization review monthly (60-90 minutes) to prioritize what to test and change next. Avoid making tactical changes based on a single day’s data — short-term variance is normal and acting on it typically makes performance worse, not better.
What is attribution in marketing automation and why does it matter?
Attribution is the process of assigning credit for a conversion to the marketing touchpoints that influenced it. It matters because without attribution, you cannot know which campaigns are actually driving revenue. Common models include last-touch (100% credit to the final touchpoint before conversion), first-touch (100% credit to the first touchpoint), and multi-touch (credit distributed across all touchpoints). Most B2B teams use a position-based model that gives 40% credit to the first touch, 40% to the last, and splits the remaining 20% among middle touches.
How do I know if my marketing automation campaigns are underperforming?
Compare each campaign’s KPIs against three benchmarks: your own historical average for that campaign type, industry benchmarks for your sector, and your defined target KPIs from Step 1 of this guide. A campaign is underperforming if it falls below your historical average for two consecutive reporting periods — one period could be noise, two indicates a trend. When you identify underperformance, start by auditing the single metric furthest from its target and form a testable hypothesis before making any changes.
Can I track campaign performance across multiple channels in one place?
Yes, with a unified marketing automation platform that supports native integrations with your key channels — email, SMS, push notifications, paid ads, and CRM. CampaignOS aggregates performance data from connected channels so you can see a subscriber’s full journey (ad click → email open → landing page visit → purchase) in a single contact timeline. This cross-channel view is essential for accurate attribution and for understanding which channel combinations produce the highest LTV customers.