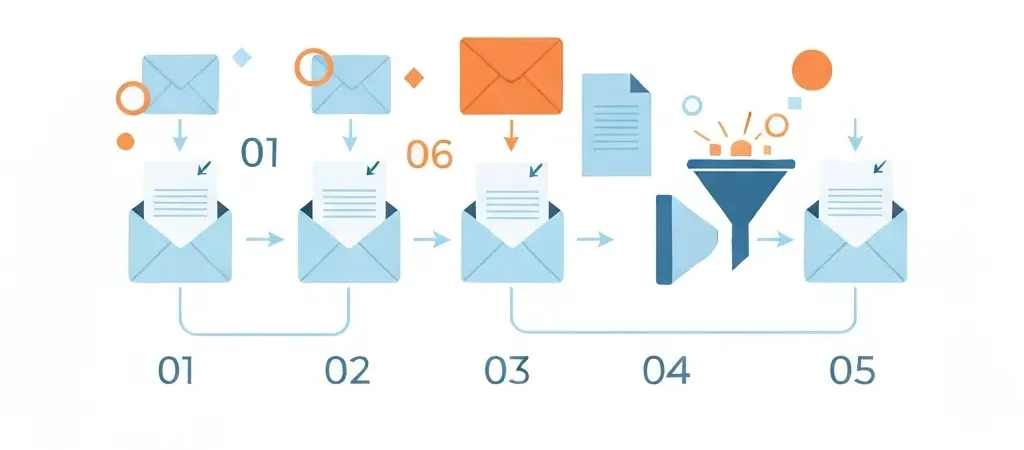
How to Create an Email Drip Campaign Step by Step (2026 Guide)
If you want to know how to create an email drip campaign step by step, you are in the right place. Drip campaigns are the backbone of every scalable email marketing strategy — they deliver the right message at the right moment without requiring manual effort every time. According to Campaign Monitor, automated email sequences generate 320% more revenue than non-automated broadcasts. Yet most marketers set them up once, never revisit them, and wonder why results plateau.
This guide walks you through all 10 steps — from defining a goal to iterating on live performance data — with practical instructions you can execute today. Whether you are building your first welcome sequence or replacing a stale nurture flow, each step is self-contained and actionable.
Prerequisites and Time Estimate
| Item | Detail |
|---|---|
| Difficulty | Beginner–Intermediate |
| Time required | 4–8 hours (first campaign); 1–2 hours for subsequent sequences |
| Tools needed | Email automation platform, audience data, a verified sending domain |
| What you will have | A live, trigger-based email sequence that runs automatically |
Before starting, confirm you have: a verified sending domain with SPF/DKIM records, a segmented contact list (even a rough one), and an automation platform that supports trigger-based workflows. If you need to set up the platform first, read How to Set Up Marketing Automation from Scratch before continuing here.
Step 1: Define Your Campaign Goal
Every drip campaign must answer one question before a single email is written: what specific action do you want the subscriber to take at the end of this sequence?
- Choose a single, measurable goal — do not combine goals. Examples: trial activation, first purchase, webinar registration, upsell conversion, churn re-engagement.
- Write the goal as a conversion event: “Subscriber completes account setup within 7 days of signup.”
- Set a baseline metric. If you have historical data, note your current conversion rate. If not, industry averages for welcome sequences run 2–5% conversion to purchase and 20–30% activation for SaaS trials.
- Determine the campaign length. Most nurture sequences run 5–10 emails over 2–4 weeks. Welcome sequences are typically 3–5 emails over 7 days.
Your goal dictates every downstream decision — tone, timing, CTA placement, and what counts as success. Without it, you are writing emails into a vacuum.
Step 2: Segment Your Audience
Sending the same drip to every contact is the fastest way to inflate unsubscribes. Segmentation ensures each sequence is relevant to the people who receive it.
- Identify the trigger that enrolls contacts: form submission, product signup, abandoned cart, tag applied, link clicked, or purchase made.
- Layer one or two additional criteria: industry, company size, last activity date, or lead source.
- Create a named segment in your platform. Be specific: “SaaS trial signups — no first login” is better than “new leads.”
- Estimate segment size. Campaigns under 200 contacts need caution with statistical conclusions; plan for at least 500 contacts before running split tests.
- Define exit conditions: what removes a contact from the sequence? Typically a conversion event (made a purchase, booked a demo) or an explicit unsubscribe.
For a deeper walkthrough of segmentation logic, see How to Segment Your Audience for Email Marketing.
Step 3: Map the Subscriber Journey
Before writing a word of copy, sketch the full journey on paper or in a visual tool. This is the step most marketers skip — and it is why sequences feel disjointed.
- List every awareness stage your subscriber passes through: unaware → aware → considering → ready to convert → post-conversion.
- Map one email to each stage transition. Each email should move the subscriber one step forward, not restart the pitch.
- Identify branch points. If a subscriber clicks a pricing link in email 2, do they enter a faster-moving closing sequence? If they do not open email 3, do they get a resend with a different subject line?
- Document each node: email number, trigger condition, subject line concept, primary CTA, and exit condition.
- Keep the map visible while writing. Every email you write should fit cleanly onto one node.
Step 4: Write Your Email Sequence
With goal, segment, and journey map in place, writing becomes filling in the blanks rather than staring at a blank page.
- Email 1 — Welcome and context: Confirm the signup, set expectations for what is coming, deliver the promised lead magnet or value immediately. Keep it under 150 words.
- Email 2 — Problem and stakes: Name the core pain point your product or content solves. Use data or a short story. No hard sell yet.
- Email 3 — Solution introduction: Introduce your approach. Show how it works, not just what it does. Include one social proof element (customer quote, metric, case study snippet).
- Email 4 — Objection handling: Address the top 2–3 reasons someone hesitates. Price, complexity, timing. Be direct.
- Email 5 — CTA and urgency: Make your ask with a clear, specific call to action. If there is a free trial, time-limited offer, or demo slot, this is where it goes.
- Write subject lines last. Use the email body to determine the most compelling hook, then turn that into the subject line.
- Preview text should complement, not repeat, the subject line. It is 40–90 characters of additional persuasion.
Step 5: Set Timing and Send Intervals
Timing is one of the highest-leverage variables in a drip campaign — and one of the most data-dependent.
- For a welcome sequence, send email 1 immediately on trigger. Delay of even 30 minutes drops open rates by 10–15% in most B2C contexts.
- Set a 1–2 day gap between emails 1 and 2. This gives the subscriber time to act on email 1 before the next touchpoint.
- For longer nurture sequences, 3–5 day intervals are standard. Shorter for high-intent (trial, demo request) segments; longer for cold lists.
- Avoid sending on Mondays before 10 AM or Friday afternoons for B2B audiences. Tuesday–Thursday, 10 AM–2 PM in the recipient’s time zone, remains the most reliable window.
- Use time-zone-aware scheduling if your platform supports it. Sending at “10 AM recipient local time” instead of a fixed UTC time lifts open rates by an average of 8% (Omnisend, 2025).
- Do not stack more than one email per day in a nurture sequence. Frequency fatigue compounds across a 5-email sequence.
Step 6: Add Personalization
Personalization beyond a first-name merge tag requires intentional data collection and field mapping — do this before your campaign goes live, not after.
- Map the data fields available in your contact records: first name, company, industry, signup source, last product interaction.
- Use dynamic content blocks to swap out sections based on segment. A SaaS subscriber and an ecommerce subscriber should see different use-case examples in email 3.
- Insert behavioral triggers: if a contact visited your pricing page before entering the sequence, variant B of email 4 should reference pricing directly.
- Personalize the from-name where appropriate. Emails from “Sarah at CampaignOS” outperform “CampaignOS Team” in reply rate for sequences targeting individual decision-makers.
- Avoid over-personalization. Referencing data the subscriber does not remember giving you reads as surveillance, not relevance.
Step 7: Configure Triggers and Enrollment Rules
Triggers are the mechanism that turns your static sequence into an automated, responsive system. This step is where you configure the automation logic in your platform.
- Create the enrollment trigger: form fill, tag applied, API event, date-based, or activity-based (e.g., visited page X).
- Set de-duplication rules. Ensure a contact cannot re-enter the same sequence while still active in it. Most platforms handle this by default, but verify.
- Configure goal completion exits. If the subscriber purchases, tag them and remove them from the nurture sequence immediately.
- Add branch logic at decision points. “If email 3 link clicked → add to ‘high-intent’ segment and enroll in closing sequence” is a common high-value branch.
- Set up suppression lists. Contacts who have unsubscribed, bounced, or are in another active campaign should be excluded from enrollment.
- Test trigger firing with a seed contact before publishing. Confirm the correct emails send in the correct order.
Step 8: Test Before You Launch
Testing is not optional. A single broken merge tag or misfiring trigger can send thousands of malformed emails before you notice.
- Send every email in the sequence to a seed list of 3–5 internal addresses. Check rendering in Gmail, Outlook, and Apple Mail — these three account for over 80% of email client market share in 2026.
- Test on mobile. Over 60% of emails are opened on mobile devices. If your layout breaks below 480px width, fix it before launch.
- Verify all merge tags render correctly. Test with contacts that have incomplete data to confirm fallback values work.
- Click every link in every email. Confirm UTM parameters are present and tracking correctly in your analytics platform.
- Fire the enrollment trigger manually with a test contact and confirm: correct sequence enrolled, correct timing delays applied, goal exit logic works when the test contact converts.
- Check deliverability. Run the first email through a tool like Mail-Tester or GlockApps to confirm your spam score is under 2.0 before sending to your full list.
Step 9: Launch Your Campaign
Once testing passes, activate the campaign and monitor the first 48 hours closely.
- Publish the automation workflow in your platform. Confirm the status shows as “Active” or “Live.”
- Enroll a small batch first if your platform allows it — 10–20% of the intended audience — and monitor for anomalies before full rollout.
- Set up real-time alerts for hard bounce spikes (above 2%) or spam complaint rates (above 0.1%). Both are deliverability red flags that require immediate action.
- Do not change the sequence content in the first 72 hours. Let the data accumulate before drawing conclusions.
- Notify your team. If the campaign generates demo requests or replies, ensure the right people are ready to respond.
For context on how this sequence fits into a broader automation architecture, see What Is Marketing Automation and How It Works.
Step 10: Analyze and Iterate
A drip campaign is never finished. The launch is the beginning of an optimization loop.
- After 2 weeks, pull the core metrics: open rate, click-through rate (CTR), conversion rate, unsubscribe rate, and revenue attributed (if trackable).
- Identify the weakest link. If email 3 has a 40% drop in open rate vs. email 2, the subject line or send timing for email 3 is the problem — not the whole sequence.
- Run A/B tests one variable at a time: subject line, send time, CTA copy, email length. Split tests on fewer than 500 contacts per variant produce unreliable results.
- Update sequences for seasonal relevance. A campaign written in Q1 2026 may reference outdated statistics or offers by Q3.
- Archive or sunset underperforming sequences. A campaign with a conversion rate below 0.5% after 500 contacts is costing you sender reputation. Pause it, diagnose, rebuild.
- Document what worked. Keep a changelog of every variation tested and its outcome. Pattern recognition across multiple campaigns accelerates future optimization.
For platform-specific automation best practices and multi-channel extensions of your drip logic, see How to Automate Customer Engagement Across Channels in 2026.
Build Your Drip Campaign with CampaignOS
CampaignOS is a free marketing automation platform purpose-built for exactly this workflow. Visual sequence builder, behavior-based triggers, audience segmentation, and deliverability tools — all in one place. No per-contact pricing, no credit card required to start.
Frequently Asked Questions
How many emails should be in a drip campaign?
Most effective drip campaigns contain 3–7 emails for a focused sequence (welcome, onboarding, trial nurture) and up to 10–12 emails for longer nurture campaigns targeting cold leads. The right number is determined by your sales cycle length and goal complexity. A SaaS trial activation sequence can convert in 4 emails; a B2B enterprise nurture sequence may need 8–10 over 6 weeks.
What is the difference between a drip campaign and a nurture campaign?
A drip campaign sends a pre-written sequence of emails on a fixed schedule regardless of subscriber behavior. A nurture campaign is behavior-driven — the path a subscriber takes changes based on what they click, open, or do in your product. In practice, most modern automation platforms blur this distinction, and “drip campaign” is often used to describe any automated email sequence, including behavior-triggered ones.
How long should I wait between drip campaign emails?
For welcome sequences, send email 1 immediately on trigger and email 2 after 1–2 days. For nurture sequences targeting mid-funnel leads, 3–5 day intervals are standard. For re-engagement campaigns targeting inactive contacts, 7-day intervals reduce unsubscribe risk. Avoid sending more than one email per day in any sequence unless the subscriber has taken a high-intent action (e.g., started a free trial).
What open rate should I expect from a drip campaign in 2026?
Welcome email open rates average 50–60% in 2026, while subsequent emails in a sequence typically range from 25–45% depending on list quality, industry, and send timing. Automated sequences consistently outperform one-time broadcasts — Mailchimp data shows automated emails achieve 70.5% higher open rates than standard campaigns. If your sequence open rates fall below 20%, subject line relevance and list hygiene are the first places to investigate.
Do I need coding skills to create a drip campaign?
No. Modern email automation platforms, including CampaignOS, provide visual workflow builders that require zero coding. You configure triggers, delays, and branch conditions through a drag-and-drop interface. The only technical prerequisites are setting up your sending domain’s SPF, DKIM, and DMARC records — which your DNS provider handles through a guided interface.
How do I prevent my drip emails from going to spam?
Five practices prevent drip emails from landing in spam: (1) authenticate your sending domain with SPF, DKIM, and DMARC; (2) maintain a clean list with regular removal of hard bounces and long-inactive contacts; (3) keep spam complaint rates below 0.1%; (4) avoid spam trigger words like “free,” “guaranteed,” or excessive punctuation in subject lines; (5) warm up new sending domains gradually — start at 50–100 emails/day and scale over 4–6 weeks before sending full volume.
Can I run multiple drip campaigns to the same contacts at once?
Yes, but you need frequency capping to avoid overwhelming contacts. Most automation platforms let you set a rule like “no more than 2 emails per 7-day period from any active campaign.” Without this, a contact enrolled in a welcome sequence, an onboarding sequence, and a promotional campaign simultaneously could receive 3+ emails in a single day, sharply increasing unsubscribes. Configure a global send frequency cap before running overlapping campaigns.